All rights reserved © 2026
Renoise is a modern tracker that sequences music vertically, and this beginner’s guide distills the essential steps from the first-run experience, so a new session becomes musical within minutes. The flow below uses the same interface areas highlighted in the video—Welcome panel, Instrument Selector, Pattern Editor, and Pattern Sequencer—so learning transfers directly to an actual project in the Renoise tracker. Along the way, core ideas like transport controls, vertical sequencing, and per-track effects are explained in simple, reproducible actions.
On launch, the Welcome panel appears with quick access to demo songs and tutorial projects, which is the fastest way to understand how a finished tracker arrangement looks and sounds. If the Welcome panel was closed, click the logo at the bottom-right to bring it back and load a demo with a double-click. Press Play or tap the spacebar to audition, then hit Stop or spacebar again to pause and start analyzing the layout at a comfortable pace.

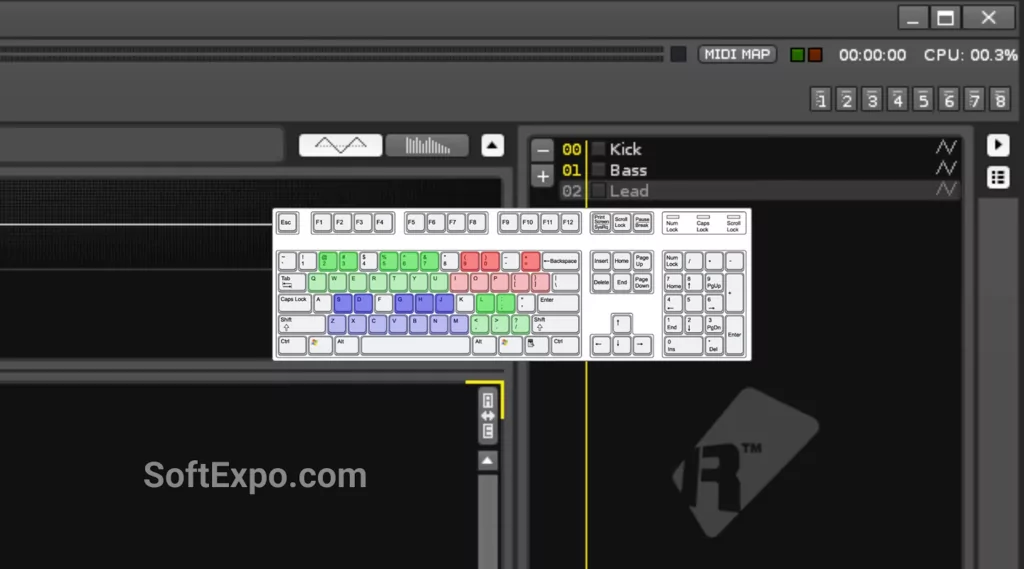
In the top-right, the Instrument Selector shows all instruments in the current song, and selecting one makes it active for input and preview. The computer keyboard is mapped like a piano, with octave colors helping orientation so it is easy to sketch ideas without a MIDI controller on day one. This design encourages a sample-first, hands-on workflow where choosing an instrument and playing notes feels immediate and musical.

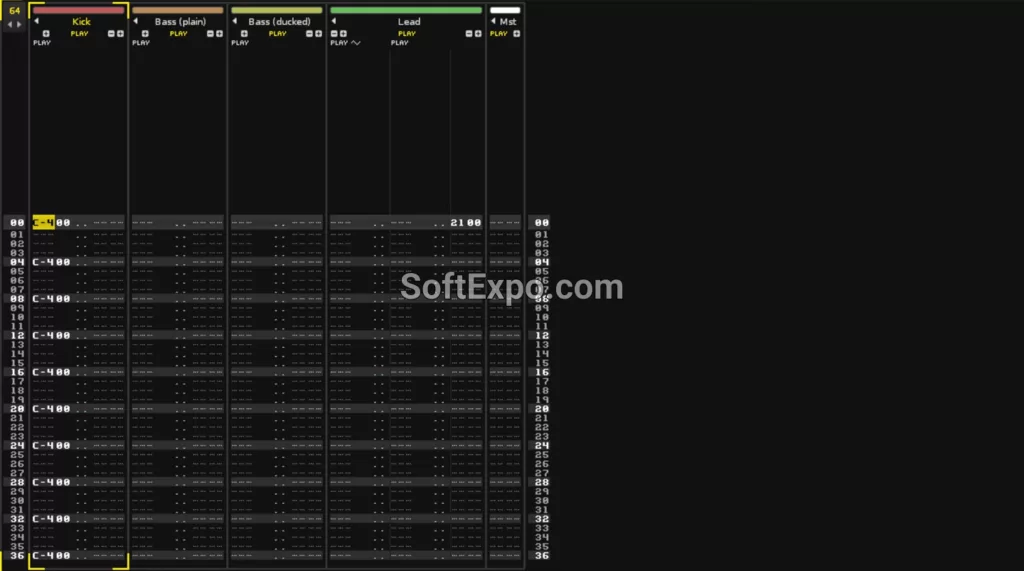
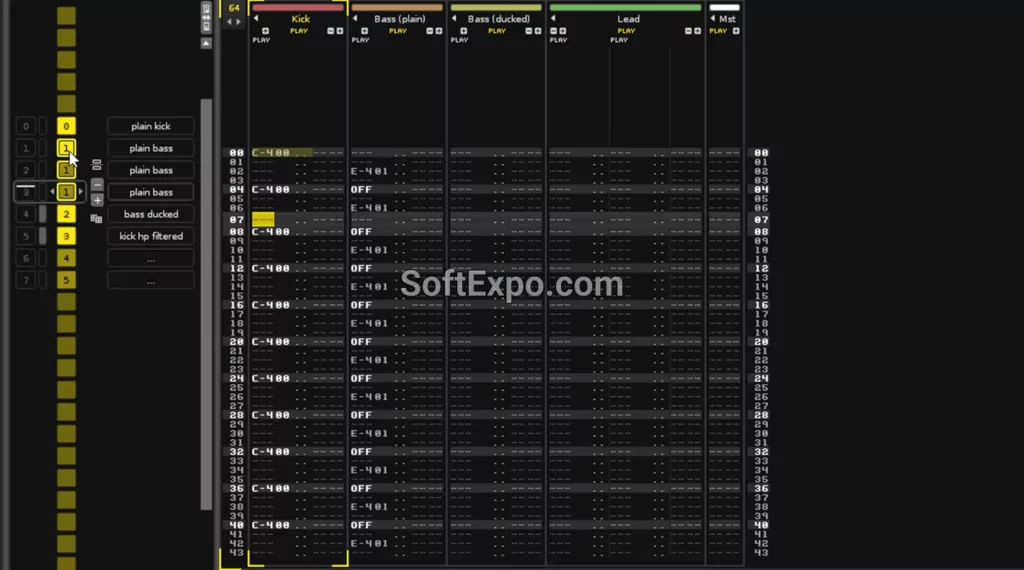
The Pattern Editor is the central column-based grid where notes are written from top to bottom, and as the playhead moves downward it triggers entries line by line in true vertical sequencing. Each note row can include a pitch and an instrument number—such as 00 for Kick or 01 for Bass—plus optional sub-columns for volume, pan, delay, and FX when deeper control is needed. Keeping one instrument per track enables clean per-track effects, clearer mixing decisions, and straightforward editing as arrangements evolve.

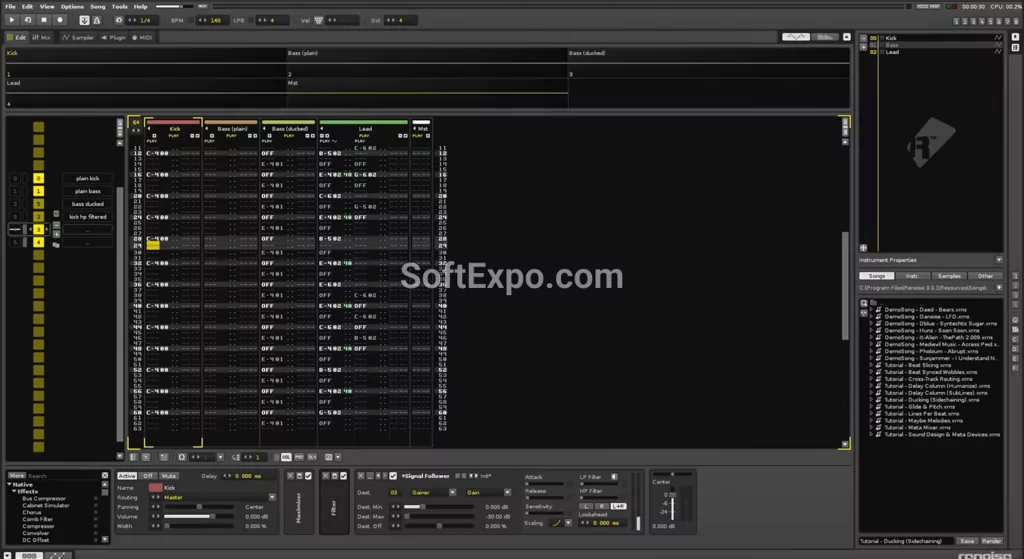
Open the Help menu and load a compact tutorial such as “Ducking (Sidechaining)” to see a minimal, readable setup that still demonstrates musical interaction between parts. Watching the playhead scroll while listening makes it easy to connect note positions to the audible groove and to understand how tracker timing feels in practice. This model-based learning shrinks the gap between theory and action inside the Renoise tracker.
And if you want to further expand your arsenal of music creation tools, visit our Audio Editing section.
A complete song is assembled in the Pattern Sequencer on the left, which lists patterns in play order to build the full arrangement. When the end of a pattern is reached, playback proceeds to the next, and by default the song loops back to the start unless told otherwise. Insert or rearrange patterns to sketch an intro, main section, and variations, then refine content inside each pattern within the Pattern Editor.

Use the transport controls at the top or the spacebar to start and stop, and enable record mode to capture notes directly into the selected track and column. Short edit steps create dense rhythmic input, while longer steps space notes evenly for quick structure drafting without manual repositioning. Muting and soloing tracks while looping a section exposes masking issues early, keeping the mix musical even before adding heavy processing.
Begin by finding a simple bass or lead lane and observe how entries like C-4 or E-4 align with the instrument numbers to identify sources at a glance. Use the visual feedback of the moving playhead to correlate pattern rows with timing, which reinforces the mental model of vertical sequencing. Once comfortable, reveal the sub-columns to shape dynamics and timing with volume, pan, delay, and lightweight FX edits per note.
The “Ducking (Sidechaining)” tutorial demonstrates how a kick can make the bass duck, creating instant clarity and rhythmic movement without manual volume rides. Scrub through the pattern to see exactly where the kick hits and how the bass responds, then loop short sections to internalize the timing. Rebuilding this chain in a new project solidifies the concept of per-track effects and how interactive dynamics are set up in the Renoise tracker.

Start from a demo song, press Play, and watch the Pattern Editor to link what is heard with what is written. Select an instrument, use the computer keyboard piano layout to record a few notes, and keep parts on separate tracks for clean per-track effects. Arrange a few patterns in the Pattern Sequencer, loop them with transport controls, and iterate until a small but complete musical idea emerges.
Repeat the same workflow with another demo to compare structure, timing feel, and instrument use, which accelerates learning through contrast. As comfort grows, expand editing by leveraging sub-columns and subtle FX entries to add micro-groove and cohesion without clutter. With these foundations, the Renoise tracker becomes a fast, musical environment where vertical sequencing and clear per-track effects drive confident arrangement decisions from the very first session.