Categories
Popular tags

All rights reserved © 2025
Categories
All rights reserved © 2025
How to Add Fonts to Photoshop For Anyone and Everyone

Enthusiast or professional? Perhaps just decided to try your hand at working with Photoshop? Especially for you we have a whole block of guides on working with Adobe. Today we will consider such a function as adding fonts in Adobe Photoshop. Adding and changing fonts allows you to expand your creativity and make your projects special and desirable. Whether you want to add one new font to your collection or several, this simple tutorial will walk you through the different methods of adding fonts in Photoshop, allowing you to quickly expand your typography toolkit.
Installing Fonts on Your System
The easiest and most convenient way to add font files to Adobe Photoshop is to install them directly into your computer’s operating system. Photoshop automatically accesses all system fonts, making this method the easiest:
For Windows Users:
- Download fonts from sites you can find online or use popular sources like Google Fonts to find free web fonts.
- Right-click on the downloaded font file (typically in .ttf, .otf, or .woff format) and select “Install” or “Install for all users.”
- Alternatively, you can:
- Extract the font files if they’re in a compressed folder
- Go to Control Panel > Fonts (or Settings > Personalization > Fonts in Windows 10/11)
- Drag and drop the font files into the fonts folder
- Restart Photoshop if it was already open to see the newly installed Photoshop fonts.
For Mac Users:
- Download your font files (.ttf, .otf, or .woff format) from font websites or Google Fonts.
- Double-click the font file to open Font Book.
- Click “Install Font” in the preview window that appears.
- Alternatively, you can:
- Open Font Book application (Applications > Font Book)
- Drag and drop your font files directly into Font Book
- Click “Install” when prompted
- Restart Adobe Photoshop to access the new fonts you’ve added.
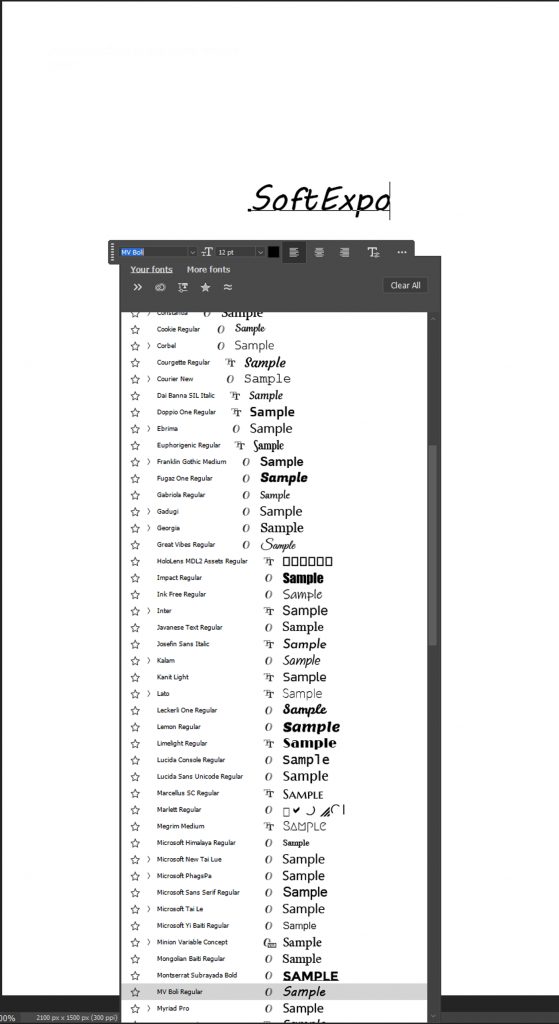
Using Adobe Fonts (Creative Cloud)
If you have a Creative Cloud subscription, you have access to thousands of professional fonts through Adobe Fonts:
- Open Adobe Photoshop and click on the “Creative Cloud” icon in the top-right corner.
- Select “Adobe Fonts” (or go to the “Type” menu and select “Find More Fonts”).
- Browse through the font library and click the “Activate” button next to any Adobe font you want to use.
- The font will automatically sync to your computer and become available in Photoshop’s font menu without requiring a restart.
- You can also browse and activate fonts directly from the Adobe Fonts website by signing in with your Adobe ID.
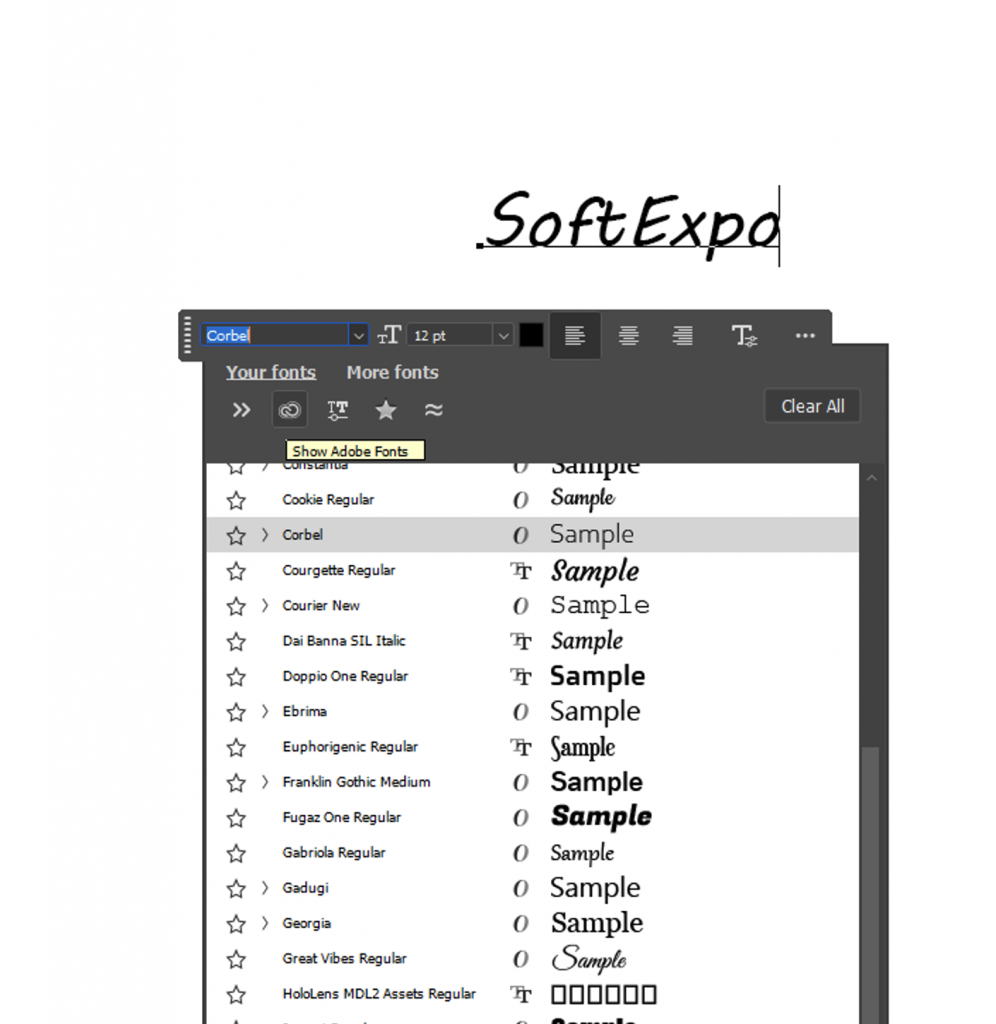
Important: Adobe Fonts provides an extensive library of high-quality fonts. Active fonts from the Adobe Fonts collection will be available in all Adobe applications, including Photoshop, Illustrator, and even Camera Raw for editing text in photographic projects. Which makes an Adobe Creative Cloud subscription a one-stop solution for those who work in multiple Adobe applications at once.
Troubleshooting Font Issues
If your newly added fonts aren’t appearing in Photoshop’s font list, try these solutions:
- Completely close and restart Photoshop to refresh the font list after adding fonts.
- Clear Photoshop’s font cache by holding Shift+Alt+Ctrl (Windows) or Shift+Option+Command (Mac) while starting Photoshop.
- Check if you have a missing font by looking for any font warnings when opening documents.
- Verify that the font file isn’t corrupted by trying to use it in another application.
- Ensure you have proper licensing for the font, as some protected fonts may not work properly.
- For PostScript fonts, make sure you’ve installed both the printer and screen font files.
- If fonts have been inadvertently removed, fonts can be reinstalled from your backup folder.
Tips for Managing Your Font Collection
- Use a dedicated font manager application to organize large collections of download fonts.
- Create font sets in Photoshop by selecting Edit > Presets > Preset Manager > Fonts to group frequently used fonts.
- Only keep necessary fonts active to avoid cluttering your font menu and slowing down Photoshop.
- Keep your original font files organized in a dedicated folder for easy reinstallation if they become missing or corrupted.
- When working with web fonts, consider how they’ll appear across different browsers if your design is for websites.
- Use Google Fonts for web projects as they’re optimized for online use and can be downloaded for use in Photoshop.
- Create a collection of your “go-to” fonts for different projects to streamline your workflow.
So, we’ve covered all the options for adding fonts to Photoshop. Let me emphasize why it’s important to use other fonts when working with typography. Because custom fonts give you the creative freedom to create unique, professional-looking graphics, logos, web design, and more. Also remember that while free fonts are widely available from sources like Google Fonts, always check the licensing terms before using fonts in commercial projects.
And as a cherry on the cake, I remind you that we have available and other guides on working with Adobe products and not only. In addition, there is an opportunity to download a variety of software, including Adobe at this link.
And I believe that our guide to fonts was as useful as possible, I am waiting for comments and questions under the post, I will be happy to answer them all!