How To Rotate an Image in Photoshop – Spin Everything!

How to Rotate an Image in Photoshop

When you start editing photos in Photoshop, you need to know the basics, and a feature like image rotation is not just the basics, it’s the foundation! Straighten a slightly crooked horizon, change the orientation of the photo or create a special artistic effect – Adobe Photoshop will easily solve these problems and offer a bunch of ways to accurately rotate images. From Photoshop CS6 to the latest versions of Creative Cloud, these rotation techniques remain the same and are great for graphic design and professional photo editing. Now I will describe all the ways to rotate images in Photoshop, from the simplest to the more complex.

Basic Rotation Methods

Rotating the Entire Canvas

The most straightforward way to rotate your entire image file is using the Image Rotation commands:

  1. Open your image in Adobe Photoshop
  2. Go to Image > Image Rotation in the top menu
  3. Choose from the following options:
    • 180° – Flips your image upside down
    • 90° Clockwise – Rotates your image a quarter turn to the right
    • 90° Counter Clockwise – Rotates your image a quarter turn to the left
    • Arbitrary – Lets you specify an exact rotation angle (more on this below)
    • Flip Canvas Horizontal – Mirrors your image from left to right
    • Flip Canvas Vertical – Mirrors your image from top to bottom
Go to Image > Image Rotation in the top menu

This is the most basic method and when using it you should realize that the commands will apply to the entire canvas, including all layers. They are ideal for quick corrections when the entire image needs the same rotation. I often use this method when working with online stores when I get a group of product photos.

Using Arbitrary Rotation

For precise image rotation at specific angles:
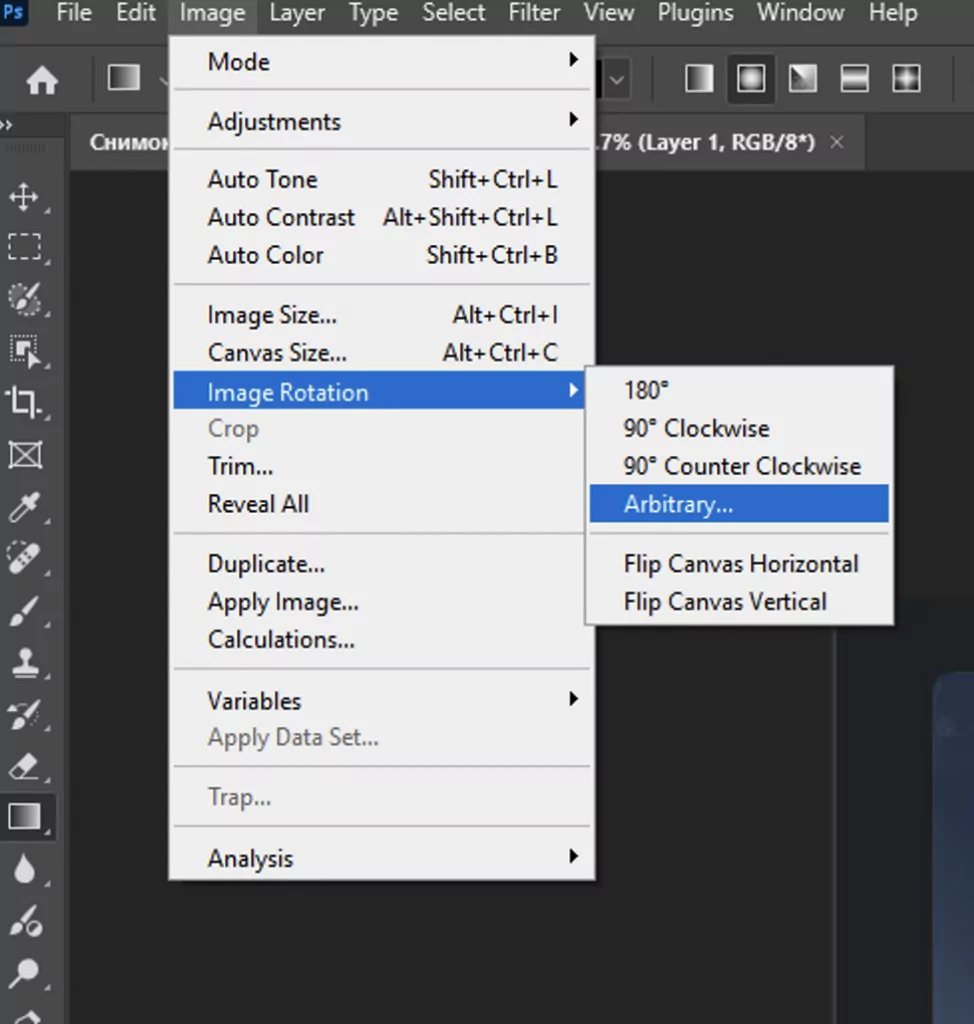
  1. Go to Image > Image Rotation > Arbitrary
  2. Enter your desired angle in the dialog box
    • Positive values rotate clockwise
    • Negative values rotate counter clockwise
  3. Click OK

A precise and convenient setting that is suitable for working with a blocked horizon or where we need to specify how many degrees we want to rotate the photo.

Quick Rotation with the Transform Tool

For more visual control over rotation:

  1. Press Ctrl+A (Windows) or Command+A (Mac) to select the entire image
  2. Press Ctrl+T (Windows) or Command+T (Mac) to enter Free Transform mode
  3. Move your cursor outside any corner of the transform box until it becomes a curved double arrow
  4. Click and drag to rotate the image
  5. Hold Shift while rotating to constrain to 15-degree increments
  6. Press Enter or click the checkmark in the options bar to apply the rotation

The Free Transform tool is a powerful feature in any photo editor, but Photoshop’s implementation gives you visual feedback as you rotate, making it easier to get the exact angle you want.

Rotating Individual Layers and Selections

One of Photoshop’s strengths is the ability to rotate specific individual layers independently:

  1. Select the layer you want to rotate in the Layers panel
  2. Press Ctrl+T (Windows) or Command+T (Mac) to enter Free Transform
  3. Rotate the layer as described above
  4. Press Enter or click the checkmark to apply

If we considered the first technique as a base, it is a more flexible system of working with photos, it is very convenient when creating photo collages or when working with several photos in one composition, when you need to rotate different elements at different angles. For example, you can rotate product photos while keeping text layers straight.

Rotating Selected Areas

If you only want to rotate part of an image:
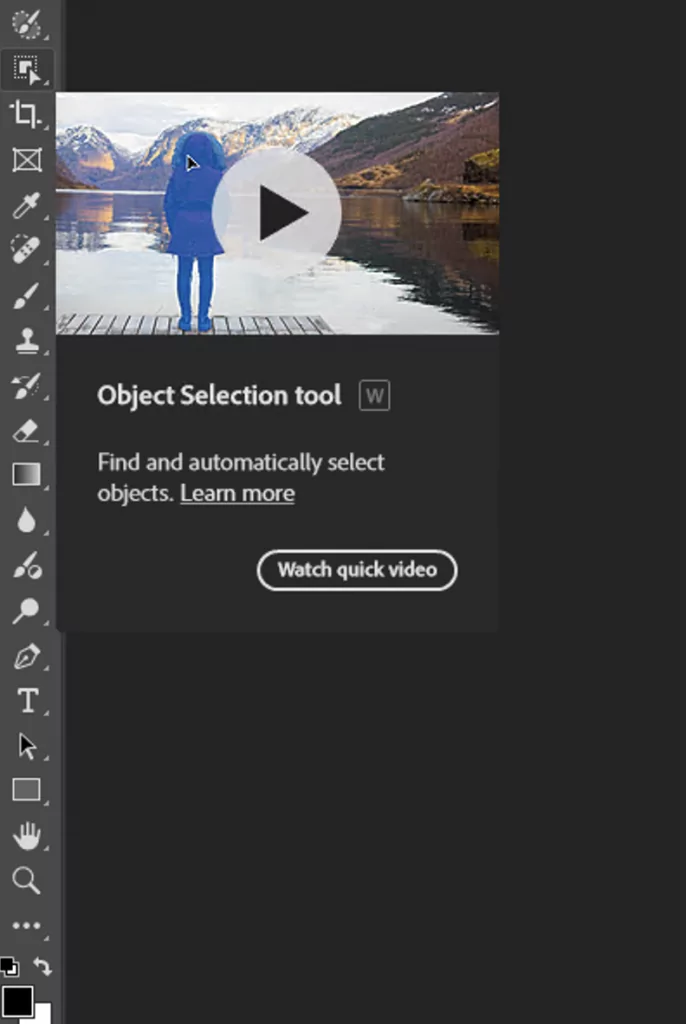
  1. Use selection tools like the Quick Select tool or Magic Wand tool to select the area
  2. Copy the selection to a new layer (Ctrl+J/Command+J)
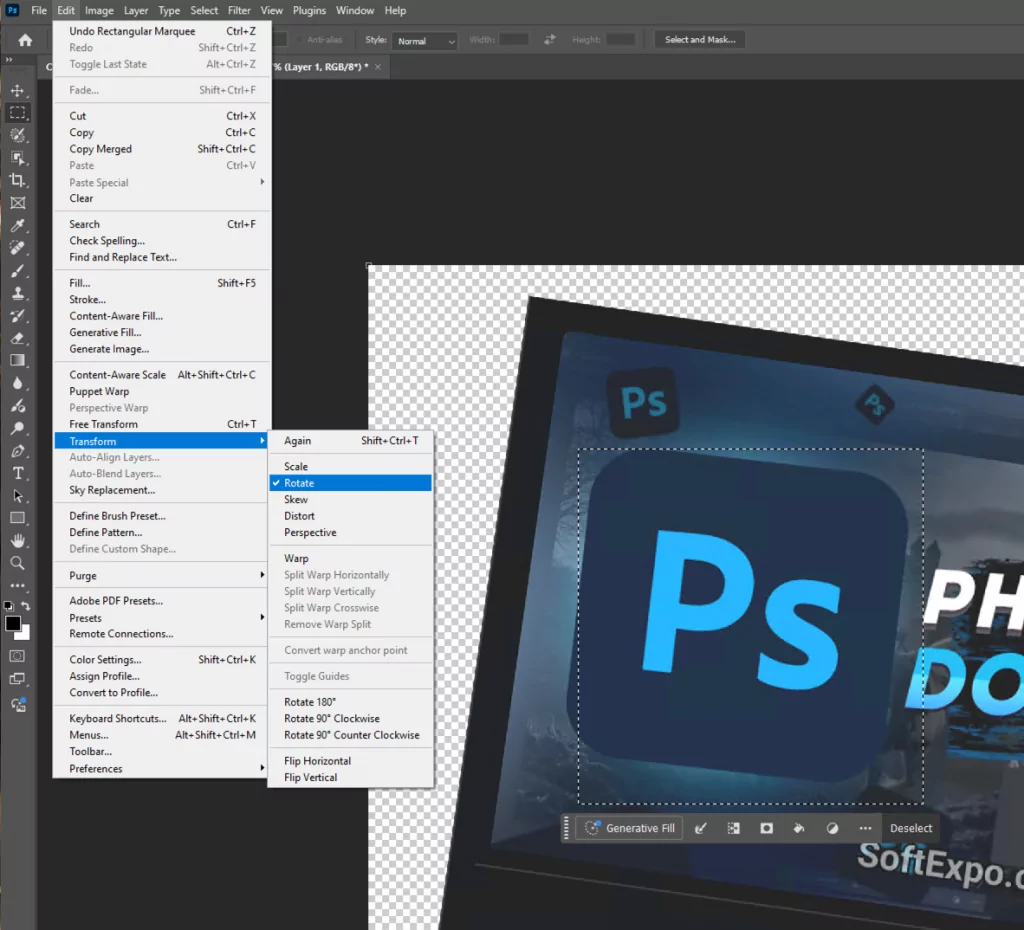
  3. Use Edit > Transform > Rotate to rotate just that element
  4. The 90 Degrees Clockwise and 90 Degrees Counter Clockwise options are particularly useful for quickly reorienting elements

This approach is valuable when creating composites using images from Adobe Stock or other sources where certain elements need reorientation.

Rotating with the Transform Command

For more transformation options:

  1. Select your layer
  2. Go to Edit > Transform and choose from:
    • Rotate 180° – Flips the layer upside down
    • Rotate 90° CW – Rotates the layer clockwise by 90 degrees
    • Rotate 90° CCW – Rotates the layer counter clockwise by 90 degrees
    • Flip Horizontal – Mirrors the layer horizontally
    • Flip Vertical – Mirrors the layer vertically

These Edit Transform options give you quick access to common rotation angles without needing to enter specific values.

Precise Rotation with the Properties Panel

For the most accurate control:

  1. Select your layer
  2. If the Properties panel isn’t visible, go to Window > Properties
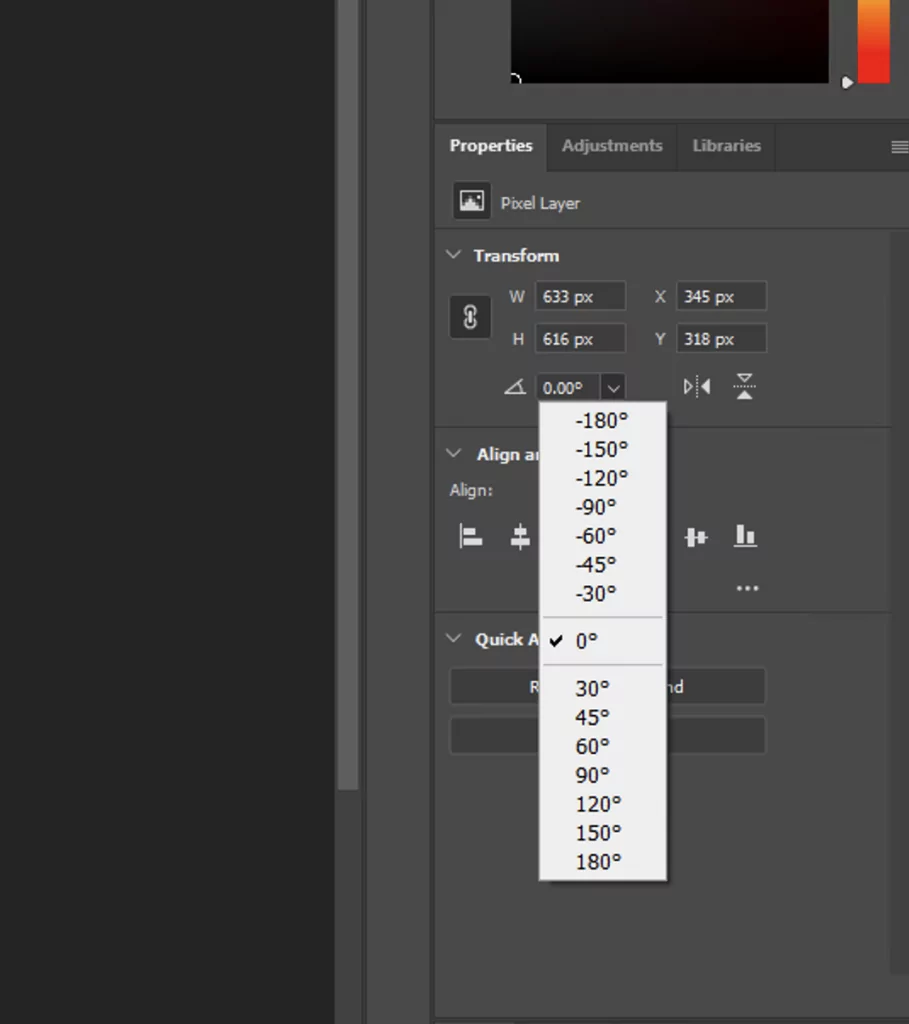
  3. In the Properties panel, find the Transform section
  4. Enter a specific value in the Rotation field

The most accurate image rotation tool, you can enter precise rotation values in it, which is ideal for technical work or when matching multiple elements in a complex graphic project.

Advanced Rotation Techniques

Content-Aware Rotation

When rotating an image, you’ll often end up with empty corners. Photoshop’s Content-Aware feature (which works similarly to modern AI image generator technology) can automatically fill these gaps:

  1. Select all layers you want to rotate (or select “Background” for the entire image)
  2. Go to Edit > Content-Aware Rotate
  3. Adjust your rotation angle
  4. Photoshop will automatically fill the empty corners based on surrounding content

This technique works best with natural backgrounds like landscapes, where patterns can be convincingly extended without noticeable artifacts in your rotated image.

Rotate View for Better Editing

Sometimes you need to rotate how you’re viewing an image without actually transforming the pixels:

  1. Select the Rotate View tool (hidden under the Hand tool in the toolbar)
  2. Click and drag to rotate your view of the canvas
  3. Edit your image in this rotated view
  4. When finished, click “Reset View” in the options bar to return to normal orientation

The Rotate View feature is especially useful when drawing or retouching at awkward angles, as it lets you work from a comfortable perspective without actually changing your image data.

Straightening with the Ruler Tool

For straightening horizons or aligning architectural elements:

  1. Select the Ruler Tool (hidden under the Eyedropper Tool in the toolbar)
  2. Draw a line along what should be straight (like a horizon)
  3. Click the “Straighten” button in the options bar, or go to Image > Image Rotation > Arbitrary
  4. Photoshop calculates the required rotation angle automatically and rotates your image

This method takes the guesswork out of straightening images and is incredibly useful for landscape or architectural photography.

Using the Crop Tool for Rotation

The Crop Tool offers rotation capabilities while simultaneously adjusting your canvas size:

  1. Select the Crop Tool from the toolbar
  2. Draw a crop boundary
  3. Move your cursor outside the boundary until it becomes a curved arrow
  4. Click and drag to rotate
  5. Press Enter to apply both the rotation and crop

Very good for straightening images and eliminating empty corners that usually appear after rotation.
Important: when talking about cropping tools, it is important to know how to use them, so I recommend you to read our guide “How to Crop in Photoshop” 

Puppet Warp for Advanced Rotation

For rotating specific parts of an image:

  1. Select the layer containing the element you want to rotate
  2. Go to Edit > Puppet Warp
  3. Click to place pins at points you want to stay fixed
  4. Click and drag parts of the image to rotate them around the fixed points
  5. Press Enter to apply

Puppet Warp allows you to perform more natural and rotational rotations, where different parts of the image can rotate differently, suitable for correcting pose in portraits or changing the position of elements in complex compositions.

Tips for Better Rotations

  • Expand your canvas first: Before rotating, go to Image > Canvas Size and add some extra space to avoid cropping your image during rotation.
  • Use Smart Objects: Convert your layer to a Smart Object (right-click the layer and select “Convert to Smart Object”) before rotating to preserve image quality through multiple transformations.
  • Check your background: When rotating layers with transparent backgrounds, make sure the checkered pattern is visible in the Layers panel, indicating transparency is preserved.
  • Use the grid: Press Ctrl+’ (Windows) or Command+’ (Mac) to toggle the grid, which can help with alignment during rotation.
  • Batch processing: When working with multiple photos that need the same rotation, use File > Automate > Batch to apply rotation actions to several image files at once.

Everything is important in Photoshop, from working with layers and texts, to the smallest angles of tilt photo or image, if you will do absolutely accurate actions described above, you will easily master this function and will feel like a pro in regardless of whether you are working with a single image or several images or even groups. 
Of course, nothing comes at once, that’s why we have a whole section dedicated to Photoshop and other vendor software guides. And of course you can find the software itself described in the text at this link
I hope I was able to tell in detail how to rotate images and you liked this material, leave your comments below and I will be happy to answer them, have a nice day!

Discussion on How To Rotate an Image in Photoshop – Spin Everything!

Tips, Help With Activation, Sharing Cracks