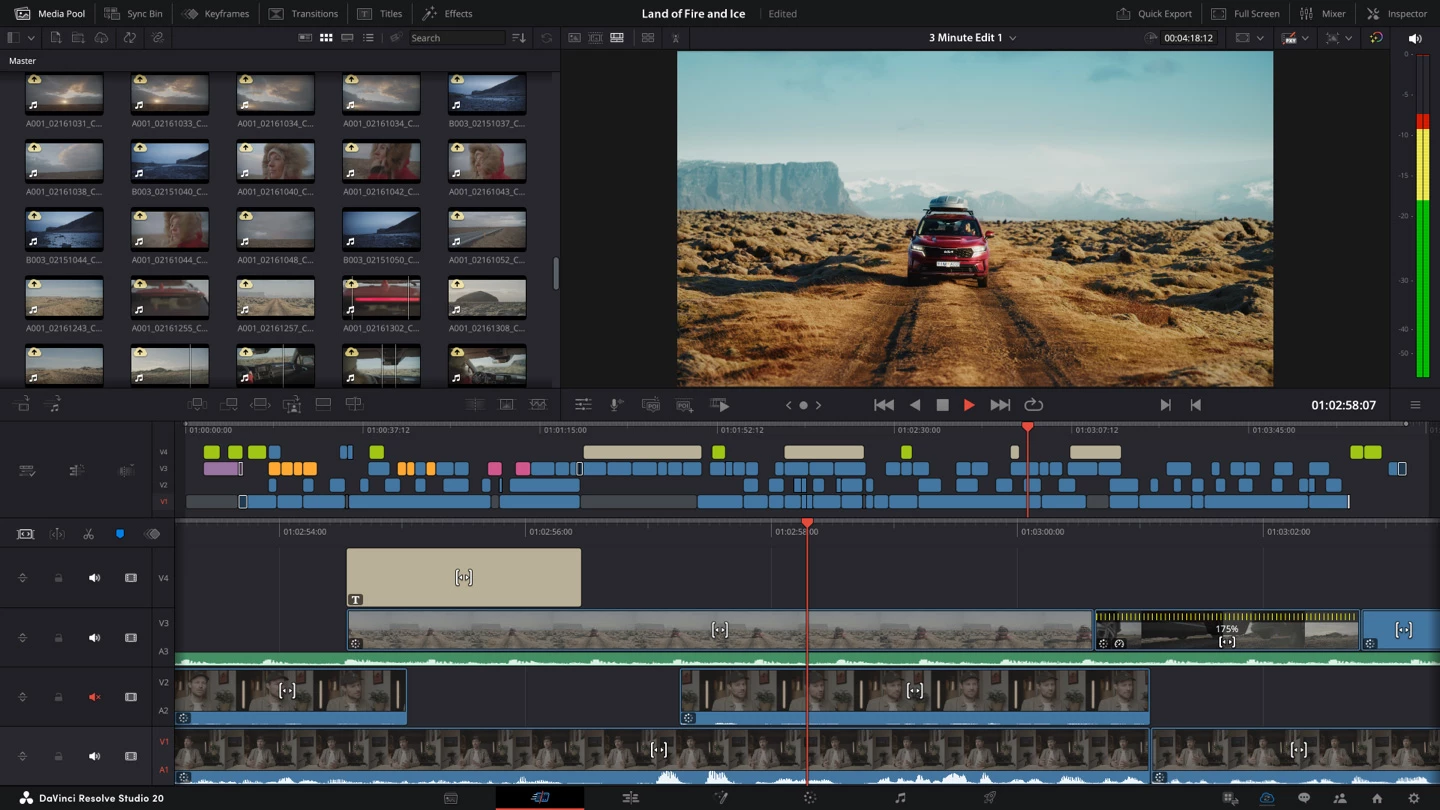
All rights reserved © 2025
Some editors feel like juggling five apps; DaVinci Resolve Studio feels like a single, confident conversation. You get one modern interface with pages for Cut, Edit, Fusion, Color, Fairlight, and Deliver, so your timeline, grade, VFX, and mix live together and move together. The result is boring reliability in the best way: you cut faster, you grade with intent, you export once — and you’re done. Resolve’s Neural Engine brings real-world helpers like voice isolation, music re-mixing, and smart reframing; Studio adds more formats, higher resolutions and frame rates, HDR delivery, and deeper AI tools when the project outgrows “good enough.”
One timeline, six specialties. Resolve’s pages map to the work: rough cuts on Cut, precision on Edit, node-based compositing in Fusion, film-grade Color, broadcast-capable Fairlight audio, and clean hand-off on Deliver. Switching pages preserves context, clips, and markers — no exports just to try an idea.
Studio power where it counts. The Studio license unlocks up to 32K/120 fps, multiple GPUs, hardware H.264/HEVC acceleration, Dolby Vision / HDR10+, immersive audio, and 40+ extra Resolve FX (AI SuperScale, de-interlacing, UltraNR). It’s the same ecosystem used to finish features and streaming episodics.
AI that saves hours, not headlines. Voice Isolation and Dialogue Separator un-mud interviews; Magic Mask isolates people or objects for targeted grades; auto scene cut and smart re-frame clear busywork so you can think about story again.
Predictable setup. Keep a standalone installer or MSI installer in your team folder so rooms can be prepared before a client review. Share a tiny text file with checksums and the latest version tag; everyone lands on the same build without guessing.
Resolve 20 leans into “fewer clicks, more clarity.” Headlines include AI IntelliScript (build timelines from a script), AI Animated Subtitles (words animate in sync with speech), AI Multicam SmartSwitch (angle switching by speaker detection), and polish across pages (stronger keyframing, better VO tools, and layout tweaks that make long days gentler). If your team standardizes versions, skim the release notes each time you refresh so exports and grades behave the same on every bay.
Free Download — full version standalone installer; MSI installer available.
1) Ingest without regrets. Create a project with timeline resolution that fits review speed (e.g., 1080p proxies for snappy play). Turn on UI performance helpers: optimized media in a mezzanine codec (DNxHR SQ / ProRes 422), and smart cache for heavy nodes. Map media, cache, and gallery stills to fast NVMe so hit-play feels instant.
2) Sync and structure. Use auto-sync by waveform/timecode for dual-system shoots. Build a tidy bin tree (Reels / Scenes / VO / Plates / Music). Add markers with short verbs (“fix hum,” “V2 swap”) so the team speaks the same shorthand.
3) Cut → grade → sweeten (without exports). Rough on Cut, refine on Edit with roll/ripple, then hop to Color with Node 01 as your input LUT or CST. Keep Node 02-04 for balance/contrast/skin, and park creative looks later — a simple structure prevents “grade spaghetti.” On Fairlight, tidy with Dialogue Separator, room tone, and a single bus compressor so stems land clean.
4) Keep it portable. Save a project archive with trimmed media and stills. Label your preset exports (“Review_HD”, “Master_ProRes”, “Social_9x16”) and share them — somebody else will hit the same buttons tomorrow.
5) Final QC that catches real mistakes. Use Scopes (not your eyes) to verify legal ranges and white balance; check loudness on the master bus (EBU R128 / ATSC A/85); and render a short test to ensure the delivery preset tags color space correctly.
Office PC (steady over flashy).
Timeline 1080p/25–30; render cache Smart on; optimized media DNxHR LB/SQ; playback set to Proxy; Fusion memory cache off; background caching on pause. Enable hardware decode/encode for H.264/H.265 if your GPU supports it.
Creator PC (balanced).
Timeline 1440p or 4K if footage is light; optimized media DNxHR HQ; render cache User on Fusion-heavy clips; one GPU for UI, the other for compute if available; keep gallery stills and cache on separate NVMe. Prioritize Neural Engine effects on adjustment clips so re-renders are minimal.
Studio PC (push it).
Timeline at acquisition resolution; optimized media only for problem codecs; cache to dedicated NVMe RAID; enable Decode H.264/H.265 and Use GPU for Blackmagic RAW where appropriate; multiple GPUs allowed for playback and NR. Reserve a few CPU cores for background processes during big renders.
(These aren’t magic — they’re safe defaults that ship work and keep review sessions calm.)
Adobe Premiere Pro 2025 – Premiere’s panel ecosystem and deep Adobe integration are excellent when your day lives in PSD/AE/AI. If you grade heavily or want fewer app hops, Resolve Studio keeps the pipeline tighter on one timeline.
Adobe After Effects 2025 – AE remains the motion-graphics king for complex text/shape rigs and plug-in ecosystems. For comp that serves an edit (roto, keys, cleanups), Fusion inside Resolve keeps you in the same project while staying node-based for clarity.
Adobe Media Encoder 2025 – If your world is bulk transcodes and watch folders, AME is still your batching buddy. For show deliveries, Resolve’s Deliver page handles IMF, HDR, audio layouts, and versioning inline — fewer logs to chase.
Wondershare Filmora X – Filmora is a friendly starter editor with quick results. If you’re shipping long-form, color-critical or multitrack mixes, Resolve’s pro pages and scopes give you room to grow.
Studio adds higher resolutions/frame rates, multi-GPU, advanced AI/NR, Dolby Vision/HDR10+, and immersive audio features. If you’re finishing for broadcast/cinema or grading heavily, Studio pays for itself quickly.
Yes. The Cut page is built for speed (dual timeline, source tape, quick trim), while Edit and Color handle precision when you have time to polish.
Keep heavy H.264/HEVC in optimized media or proxies; mixed formats are normal. Hardware decode + smart cache keep playback smooth.
Yes. Fusion lives in the same project; render it on the timeline and deliver with the rest — no export-import dance.