Quick CPU Pro by CoderBag is a precision-engineered utility designed to fine-tune and monitor processor performance on Windows systems. Unlike basic task managers, this specialized tool gives users granular control over critical CPU parameters like Core Parking, Frequency Scaling, and Turbo Boost technologies. It serves as an essential instrument for enthusiasts looking to squeeze every drop of power from their hardware or laptop users aiming to extend battery life through intelligent resource management.
Key Features
- Core Parking Manager: Allows users to manually enable or disable CPU core parking, preventing the system from idling specific cores during high-demand tasks to reduce micro-stutters and latency.
- Turbo Boost Control: Provides direct sliders to adjust Intel Turbo Boost and AMD Precision Boost indices, ensuring processors sustain maximum clock speeds during gaming or rendering workloads.
- Advanced Stress Testing: Includes a dedicated module (introduced in version 6.0) to validate system stability by placing controlled loads on individual cores, threads, or the entire package.
- Power Plan Management: Enables the creation and modification of custom power profiles, allowing for seamless switching between high-performance modes and energy-efficient states without navigating complex Windows settings.
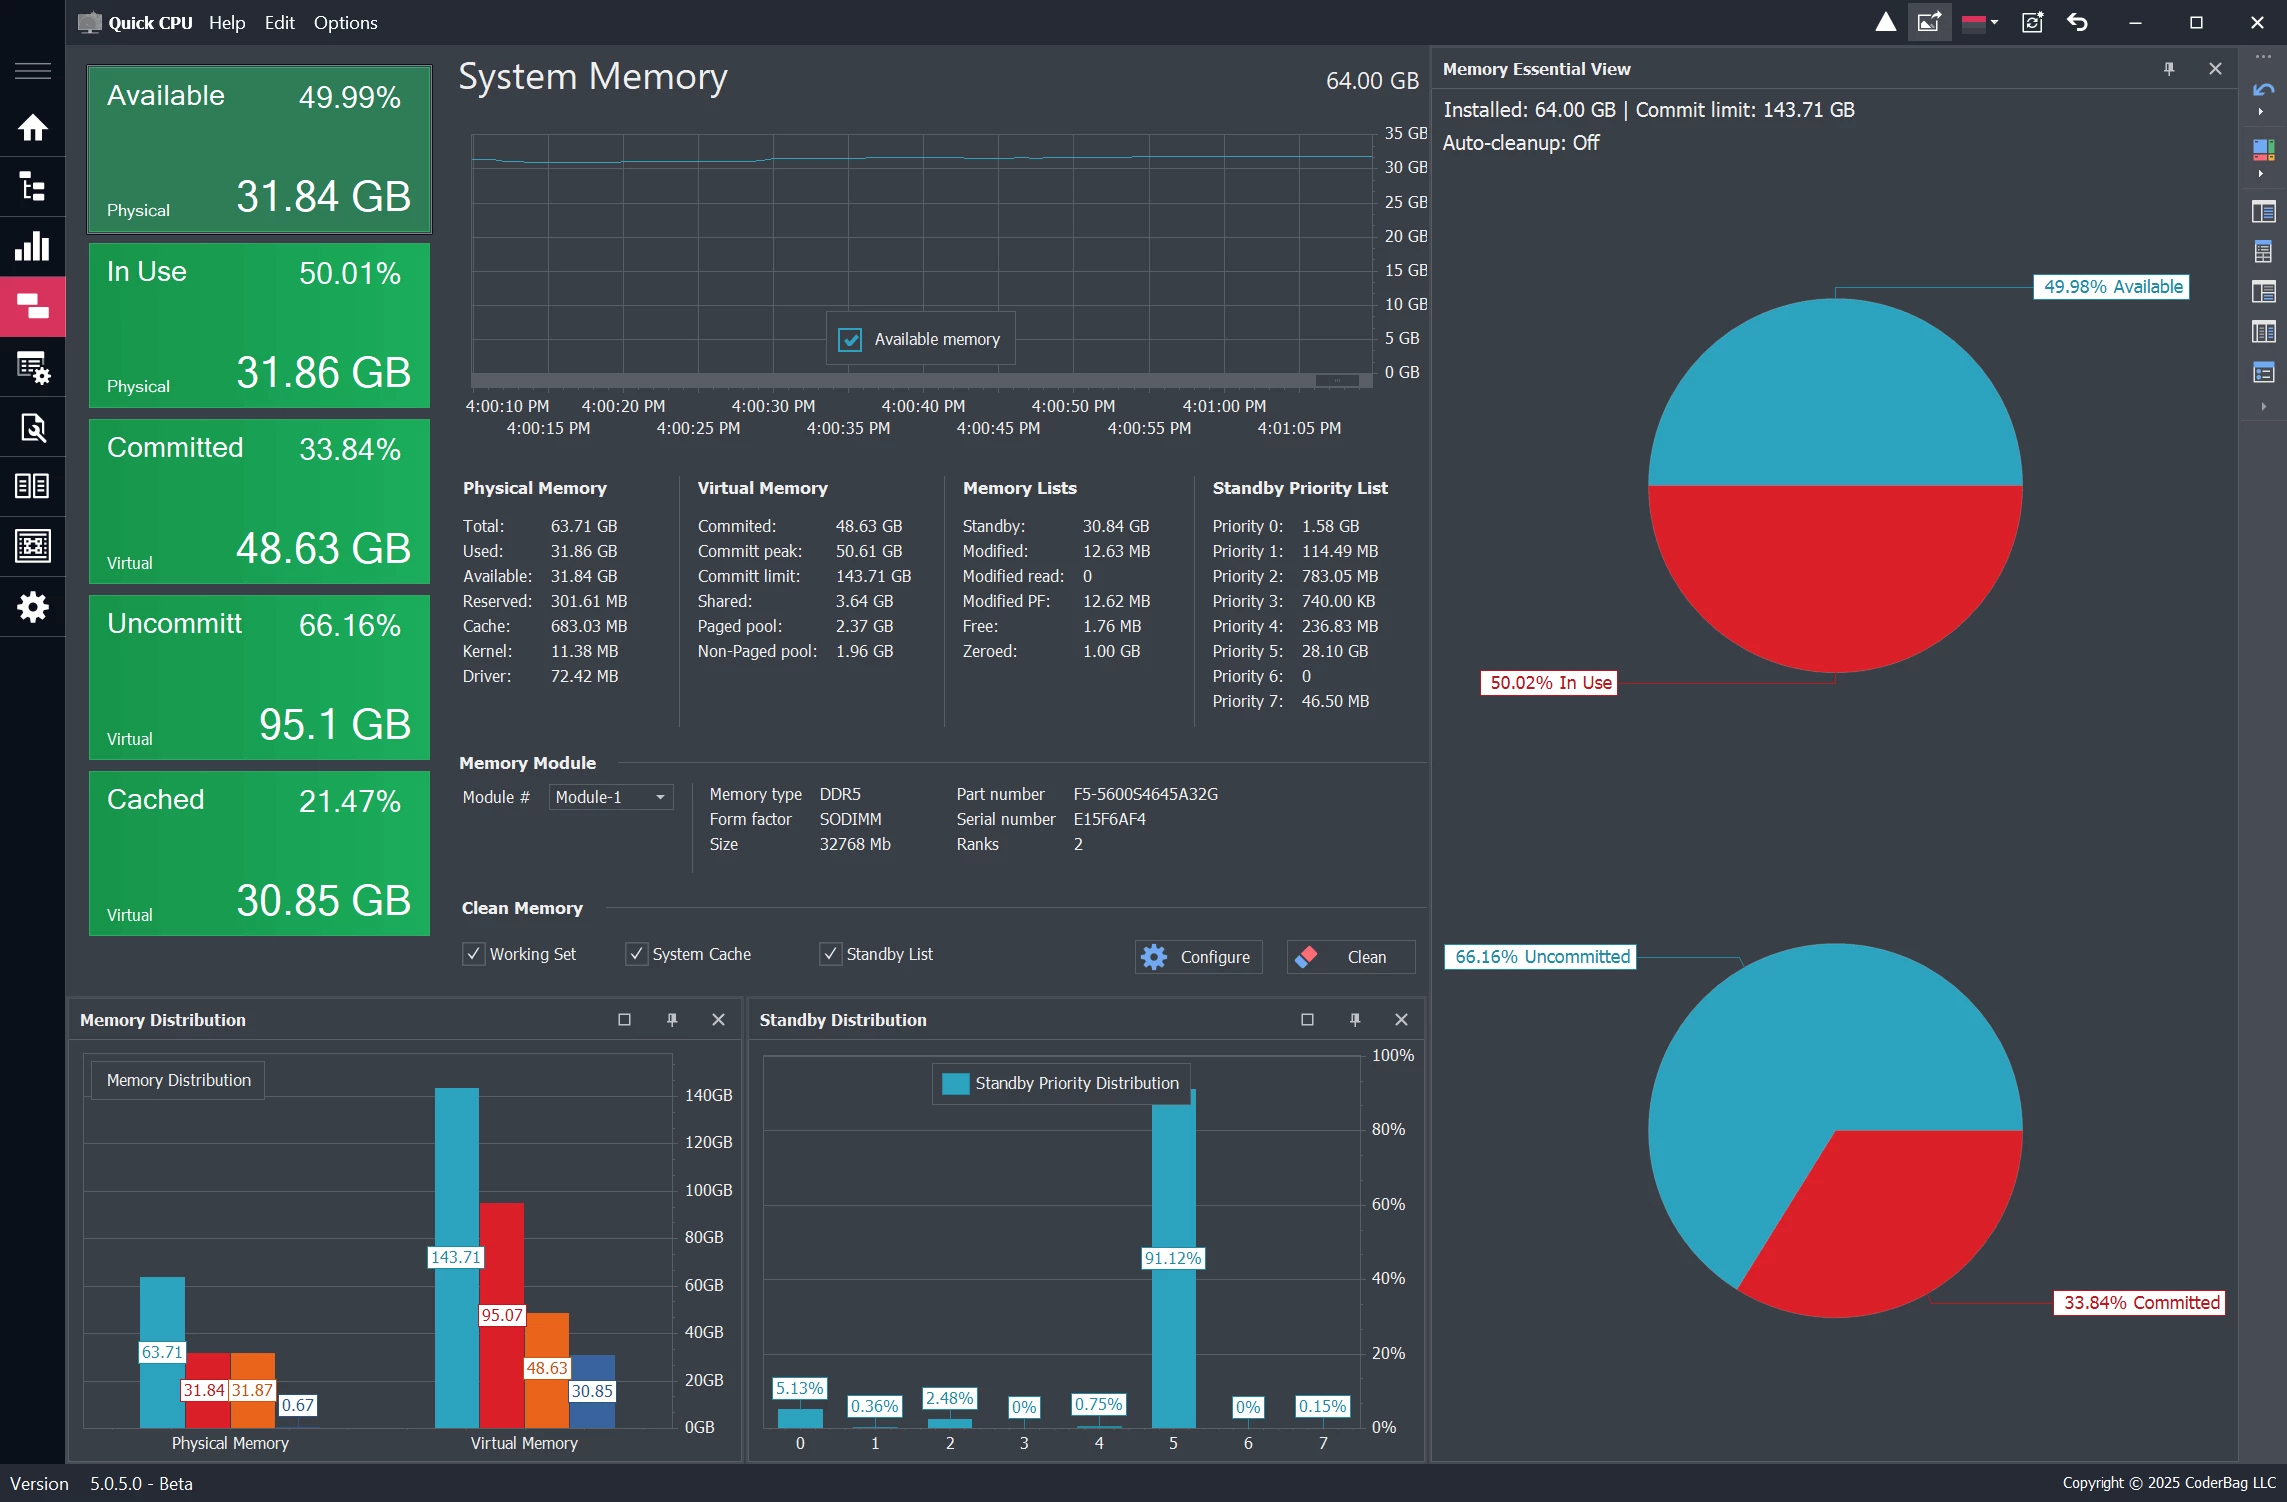
- Real-Time Sensor Monitoring: Displays detailed, per-core graphs for temperature, utilization, and power draw, utilizing data directly from hardware sensors for maximum accuracy.
- Pro-Level Reporting: Exclusive to the paid tier, this feature exports detailed system health and performance logs into multiple formats (HTML, Excel, PDF) for professional analysis and record-keeping.
Use Cases
Quick CPU Pro is indispensable for PC gamers who need to eliminate frame rate drops caused by aggressive power-saving measures, ensuring a smooth competitive experience. It also benefits content creators and video editors who require sustained processing power for long render times, as well as laptop users who can undervolt or limit CPU frequency to keep their devices cool and quiet during meetings.
With its ability to safely unlock hidden performance potential while offering professional-grade monitoring tools, Quick CPU Pro stands out as the definitive choice for users who demand total command over their silicon.
Version 6.1.0.0 — December 2025
- Enhanced CPU Stress Test Module: Improved stability testing capabilities with new options for per-core and per-thread load selection to validate system reliability under specific conditions.
- Advanced Performance Controls: Updated Intel Speed Shift and FIVR (Fully Integrated Voltage Regulator) settings for more precise power and frequency management.
- Expanded CPU Support: Added optimization profiles and compatibility fixes for the latest generation of Intel and AMD processors.
- System Stability Improvements: Fixed minor bugs related to power plan application and enhanced real-time monitoring accuracy.