Bambu Studio is a specialized 3D slicing application engineered to manage the entire additive manufacturing workflow, transforming raw digital models into precise machine instructions. Traditional slicing utilities often act as simple converters, outputting raw G-code files that must be manually transferred to a physical machine. This desktop application operates differently, functioning as a complete command center that handles file preparation, geometric calculation, network transmission, and live hardware monitoring within a single interface. By utilizing the 3MF project format instead of outdated STL files, the software stores multi-plate layouts, customized modifier meshes, specific material parameters, and coloring data in one unified archive. This structural approach ensures that complex print settings are preserved alongside the 3D geometry, allowing operators to save, share, and modify complete workspaces without losing critical manufacturing variables.
The software interfaces directly with hardware to streamline the physical printing process. Instead of managing SD cards, users connect the application directly to their local network or cloud account, enabling direct job transmission to the machine. The interface is divided into distinct operational tabs: Prepare for model orientation and painting, Preview for inspecting the compiled G-code paths, and Device for monitoring live telemetry. Within the Device tab, operators can view a live camera feed of the build plate, check real-time chamber temperatures, monitor toolhead coordinates, and observe exact material humidity levels. The slicing engine incorporates the Arachne perimeter generator, an algorithm that dynamically adjusts extrusion line width to accurately reproduce fine details and thin walls without leaving structural gaps.
For multi-material fabrication, the software provides a dedicated suite of digital painting tools that interact directly with connected filament-switching hardware. Users can import a single-color mesh and assign up to sixteen different physical materials to specific geometric faces, layers, or volumes. The slicing engine automatically calculates the necessary tool changes, builds required prime towers, and computes exact flushing volumes to prevent color bleeding during nozzle transitions. By consolidating the slicing engine, material management, and remote hardware control into one desktop client, the application removes the friction of jumping between separate web dashboards, local preparation tools, and physical interface screens.
Key Features
- Feature Name: Project-Based 3MF Workflow: Instead of exporting isolated text commands, the software saves complete workspaces as 3MF files. This format retains multiple virtual build plates, customized modifier geometries, local support blocker placements, and custom filament profiles in a single compressed package, preventing the loss of specific temperature or retraction configurations.
- Feature Name: Advanced Color Painting Interface: Operators can apply different materials directly to a monochrome mesh using specific spatial tools. The interface includes a Sphere tool for volumetric painting through multiple layers, a Triangle tool for isolating specific geometric faces, a Height Range tool for setting horizontal color bands, and a Smart Fill bucket for coloring boundaries enclosed by sharp topological edges.
- Feature Name: Automatic Material System Synchronization: The application communicates directly with attached hardware units to read RFID tags and sync available spools into the project palette. Users can assign these loaded spools to specific model parts simply by selecting the object and pressing keyboard shortcuts 1 through 9.
- Feature Name: Intelligent Auto-Orientation and Layout: The software calculates the most stable printing position based on center of gravity and overhang angles. Pressing Shift+R automatically rotates models to minimize required support structures, while Shift+A arranges multiple objects across the virtual build plate to optimize spatial efficiency and reduce collision risks.
- Feature Name: Dynamic Tree Support Generation: The slicing engine calculates organic, branching support structures that reach around complex overhangs while consuming less material than standard grid supports. Operators can manually paint support enforcers onto critical overhangs or apply blockers to prevent support material from generating inside threaded holes or fragile internal cavities.
- Feature Name: Live Monitoring and Network Transfer: A built-in device panel connects to the machine's live camera feed and diagnostic sensors. Pressing Ctrl+Shift+G compiles the G-code and sends the print job directly to the hardware over Wi-Fi, bypassing physical media transfers and allowing users to pause, resume, or cancel jobs remotely.
- Feature Name: Integrated Flow Dynamics Calibration: The application includes native calibration sequences for tuning material extrusion. Users can run automated or manual line tests directly from the interface to determine the optimal pressure advance values, ensuring sharp corners and consistent layer lines without relying on external test models.
How to Install Bambu Studio on Windows
- Download the installer archive from our website to a designated folder on your Windows 10 or Windows 11 local storage drive.
- Extract the downloaded archive using your preferred extraction utility into a new, accessible folder on your desktop.
- Open the
readme.txtfile located in the extracted folder to review any immediate setup prerequisites or required directory permissions. - Run the setup executable file from the extracted folder to initiate the installation wizard.
- Follow the prompts to select your destination path, maintaining the default
C:Program FilesBambu Studiodirectory to ensure proper network plugin registration. - Allow the installer to add the Bambu Network Plug-in when prompted; this specific component is required to enable Wi-Fi job transmission and remote camera feeds.
- Launch the application from the newly created desktop shortcut to open the initial setup wizard, where you will select your geographical region and check the boxes for your specific printer models and nozzle sizes.
- Complete the final setup screen by logging in with your user account, which binds the desktop software to your hardware and enables cloud synchronization on first launch.
Bambu Studio Free vs. Paid
Bambu Studio is completely free to download, install, and operate. The software is built upon the open-source foundations of PrusaSlicer and Slic3r, and is distributed under the GNU AGPL license. There are no premium subscription tiers, hidden paywalls, or paid enterprise versions required to unlock advanced features. Every tool within the application, from the multi-color painting interface to the remote network monitoring dashboard, is included in the standard installation at no cost.
The business model supporting the software relies entirely on the sale of physical 3D printers, official filament spools, and hardware replacement parts. The slicing software serves as the required operational bridge for this hardware ecosystem rather than a direct revenue stream. Because the software is tied to continuous hardware usage, the development team releases frequent bug fixes, slicing algorithm updates, and UI improvements without attempting to charge users for major feature additions.
While the software interacts closely with MakerWorld, a cloud-based repository for 3D models, accessing these network features only requires registering a free user account. Operators who prefer to avoid cloud infrastructure entirely can run the slicer in LAN-only mode. This offline mode retains local network functionality, allowing direct Wi-Fi printing and camera monitoring without requiring internet access or paid offline licenses.
Bambu Studio vs. PrusaSlicer vs. UltiMaker Cura
PrusaSlicer provides the underlying open-source architecture that Bambu Studio was originally built upon, meaning experienced operators will recognize the core interface layout and menu logic. PrusaSlicer excels in its broad, hardware-agnostic approach, offering meticulously tuned profiles for hundreds of different third-party machines. Operators managing print farms with diverse equipment brands often prefer PrusaSlicer for its universal compatibility, strict open-source purity, and extensive macro scripting capabilities. Choose PrusaSlicer if you operate a mixed fleet of printers from various manufacturers and need a single, reliable application to manage all of them.
UltiMaker Cura operates on a completely different slicing engine and interface paradigm, focusing heavily on granular parameter control with hundreds of individual settings exposed directly to the user. Cura relies on a massive marketplace of community plugins to extend its functionality, allowing operators to add custom support algorithms, specialized CAD integrations, or specific mechanical tweaks. It remains a standard choice for users who want absolute, itemized control over every single extrusion variable, or those working with older Cartesian machines that benefit from extensive community troubleshooting profiles.
Bambu Studio is the better fit when working specifically with Bambu Lab hardware, high-speed CoreXY machines, or multi-material configurations. Its integrated network communication, native AMS color mapping, and 3MF project structure eliminate the friction of configuring separate plugins or third-party network senders. If your priority is a streamlined workflow that moves quickly from importing a model to monitoring the live print camera with accurate multi-color translations, Bambu Studio provides a more cohesive, unified environment than both Cura and PrusaSlicer.
Common Issues and Fixes
- Problem description. Bambu Studio crashes immediately after slicing large models. This error frequently occurs on Windows systems equipped with NVIDIA graphics cards due to driver conflicts with the slicer's preview renderer. To fix this, open the NVIDIA Control Panel, navigate to Manage 3D Settings, locate "Threaded optimization" in the list, and change the value to Off.
- Problem description. The software fails to detect the printer over the local network. Connection drops happen when Windows Defender Firewall blocks the network plugin's background communication. Open your Windows Firewall settings, verify that both inbound and outbound rules allow the Bambu Studio executable, and ensure the printer and PC are connected to the exact same network subnet.
- Problem description. The on-screen filament colors do not match the physical spools in the AMS. This synchronization failure happens when using third-party filaments without official RFID tags. Click the synchronization icon in the device tab to force a hardware refresh, or manually click the color squares in the filament panel to edit the generic material profiles to match your physical spools.
- Problem description. Multi-color prints generate excessive filament waste in the prime tower. The default flushing volumes are often too conservative, purging more material than necessary to prevent color bleeding during nozzle transitions. Open the Flushing Volumes menu and reduce the global multiplier from 1.00 to 0.60, or check the specific option to flush transition material into the model's infill and support structures.
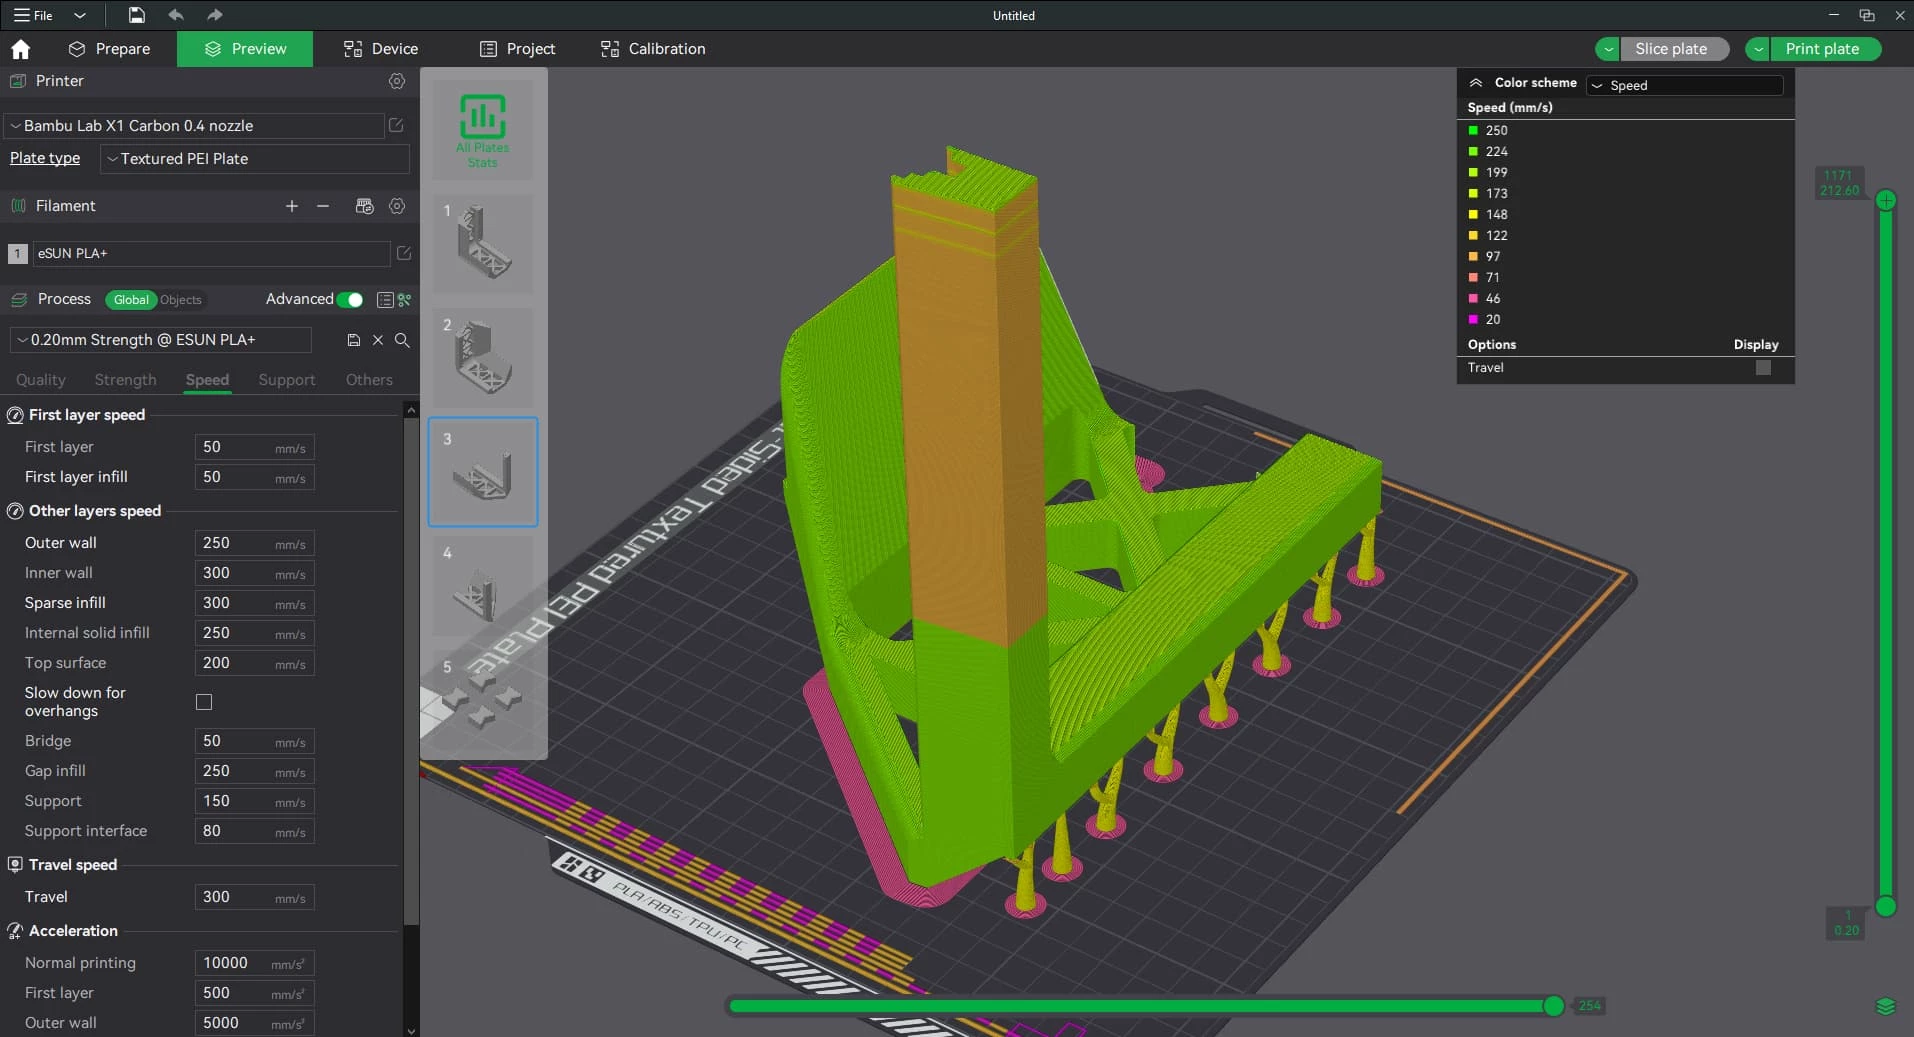
- Problem description. Overhangs print poorly and show drooping filament lines. This happens when the print speed remains too high during complex geometry maneuvers or when cooling is insufficient. Navigate to the Speed tab and reduce the overhang speed settings, or switch the perimeter generator from Classic to Arachne to allow dynamic line width adjustments on sharp corners.
Version 02.04.00.70 — November 2025
- Added compatibility for Bambu Lab H2C printer with support for up to 6 nozzles on the right extruder
- Introduced Hybrid Mode slicing capability that works with both high-flow and standard nozzles simultaneously
- Implemented purge mode switching between Standard and Purge Saving modes to reduce material waste
- Added ability to assign specific nozzles for printing designated filaments on the right extruder
- Enhanced Device page to display comprehensive nozzle information with automatic data reading
- Introduced "Outer wall & infill interlocking" feature to strengthen shoe models and improve bonding between walls and sparse infill
- Added high-flow slicing support for E3D nozzles on X/P series printers
- Implemented new advanced G-code Viewer with improved performance on systems with discrete GPUs
- Added align and distribute tools for multiple selected objects or parts along X, Y, and Z axes
- Introduced "Move plate" function to translate entire build plates to specified positions
- Refreshed project page interface with content editing capabilities
- Improved extruder parameter configuration interface for easier adjustments
- Enhanced white filament display in AMS to show 10% remaining when below threshold
- Added G-code Viewer state persistence to remember expanded or collapsed status
- Implemented "Select All" button in Boolean operations panel for faster multi-selection
- Resolved sorting issues on Device page filament list