Description
Installing custom brushes in Adobe Photoshop allows you to expand your creative toolkit beyond the default options. By importing third-party brush packs, you can easily add unique textures, painting effects, and stamp-style graphics to your designs. You only need a valid brush file and a few moments to integrate these new tools into your workflow.
What You'll Need
Before beginning, ensure you have the following ready:
- **Adobe Photoshop** installed on your Windows computer (Version CC 2020 or newer is recommended for the smoothest experience).
- A downloaded **brush pack**, typically a file ending in **.ABR**.
- If your download came as a **.ZIP** file, you must right-click it and select **Extract All** to access the .ABR file inside.
Step-by-Step Guide
- **Locate your brush file:** Open File Explorer and navigate to the folder where you saved your downloaded brushes (usually your 'Downloads' folder). Ensure you have extracted the file if it was zipped.
- **Launch Photoshop:** Open Adobe Photoshop on your Windows desktop. You do not need to have a specific document open, but creating a blank canvas (File > New) helps you test the brushes immediately.
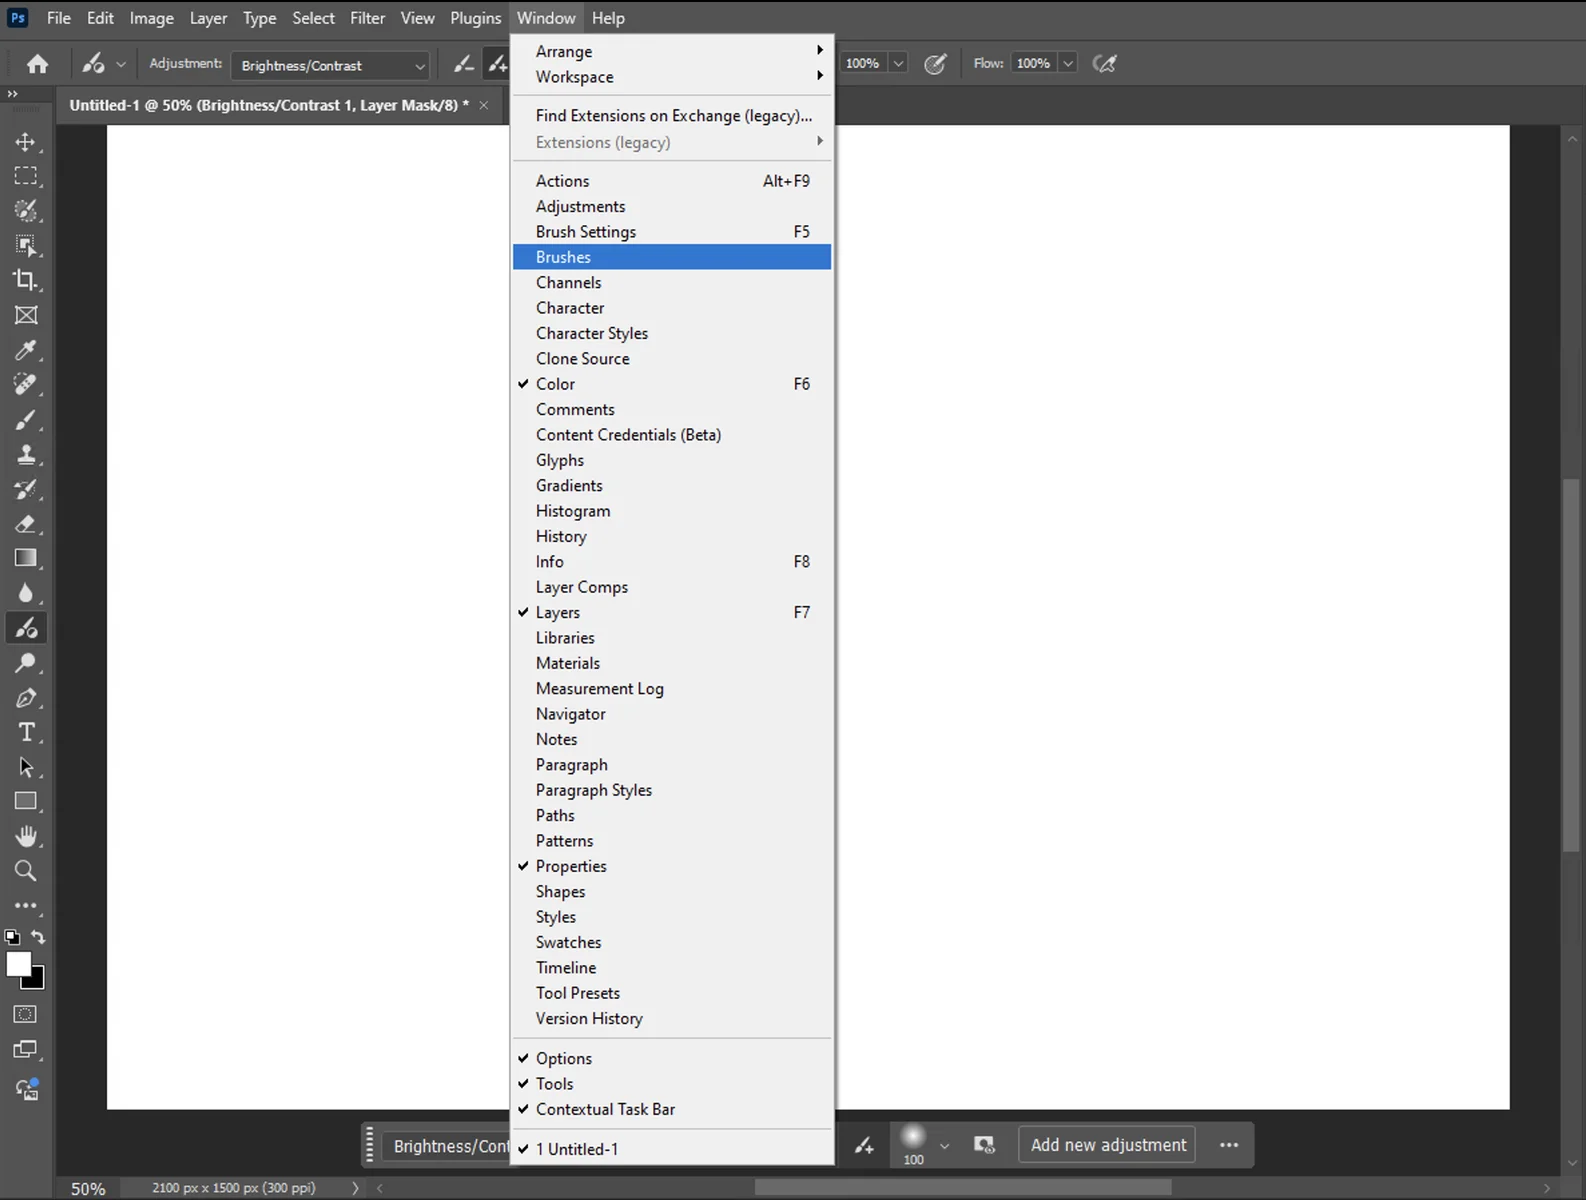
- **Open the Brushes Panel:** Go to the top menu bar and select **Window > Brushes**. This will open the Brushes panel, typically on the right side of your workspace.
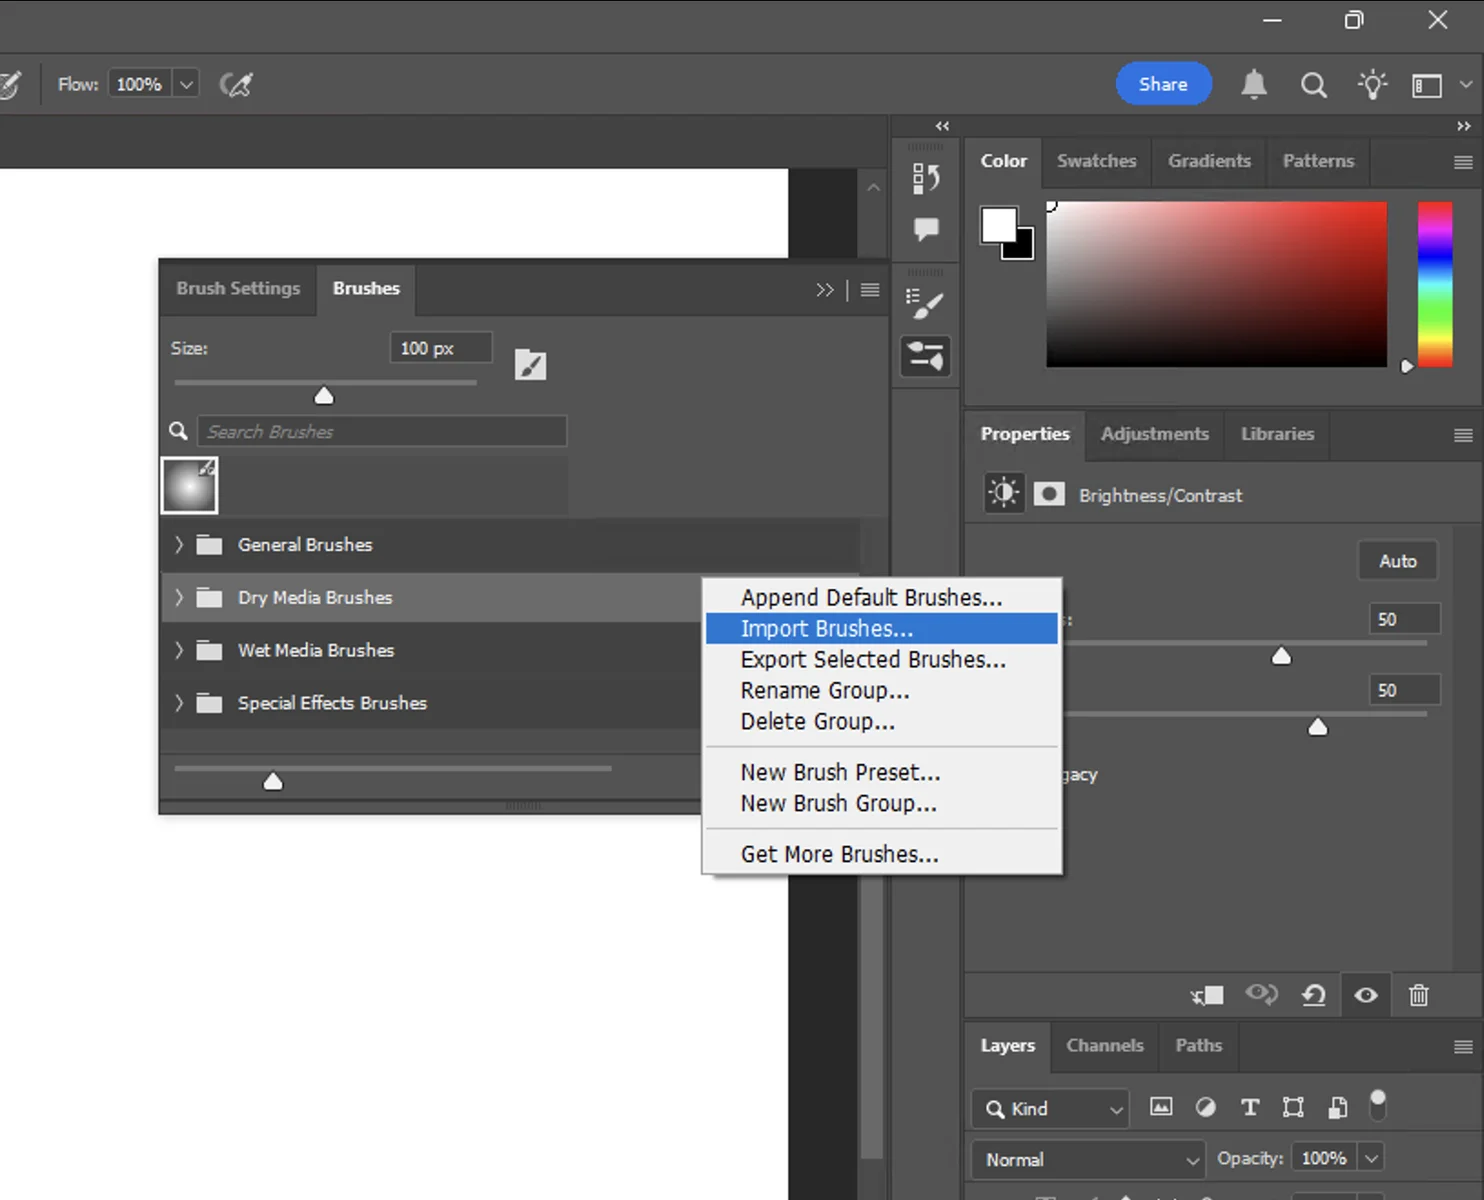
- **Access the Import Menu:** In the top-right corner of the Brushes panel, click the **'hamburger' menu icon** (four small horizontal lines).
- **Select Import Brushes:** From the dropdown list, click on **Import Brushes...** (Note: In very old versions, this may be labeled 'Load Brushes').
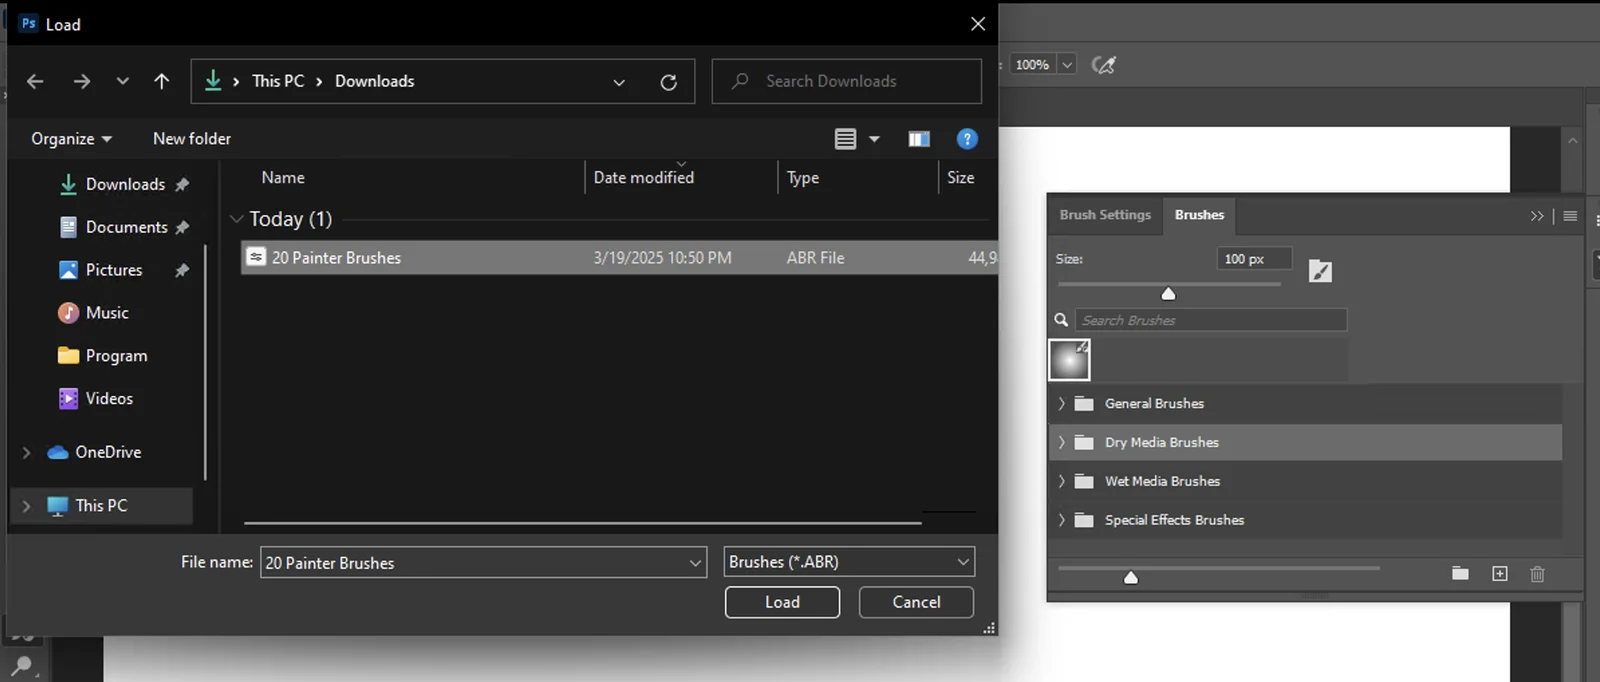
- **Select your file:** A file browser window will pop up. Navigate to your extracted .ABR file, select it, and click **Load**.
- **Verify installation:** Scroll to the very bottom of your Brushes panel list. Your new brush pack will appear as a folder or group at the end of the list.
- **Test the brush:** Press **B** on your keyboard to select the Brush Tool, click on one of your new brushes in the panel, and paint on your canvas to test it.
Tips for Better Results
- **Drag and Drop:** For a faster method, you can simply drag the .ABR file from your Windows File Explorer directly into the Photoshop window. This works instantly in most modern versions.
- **Check the Bottom:** Photoshop always adds new imports to the bottom of your brush list. If you don't see them immediately, scroll down.
- **Organize with Groups:** If you import many packs, your list can get messy. Right-click inside the Brushes panel to create 'New Brush Group' folders to keep your collection sorted by style (e.g., 'Watercolors', 'Textures').
- **Cursor Precision:** If you cannot see the brush shape while painting, check if your **Caps Lock** key is on. Pressing it switches the cursor from the brush outline to a precise crosshair target.
Common Mistakes to Avoid
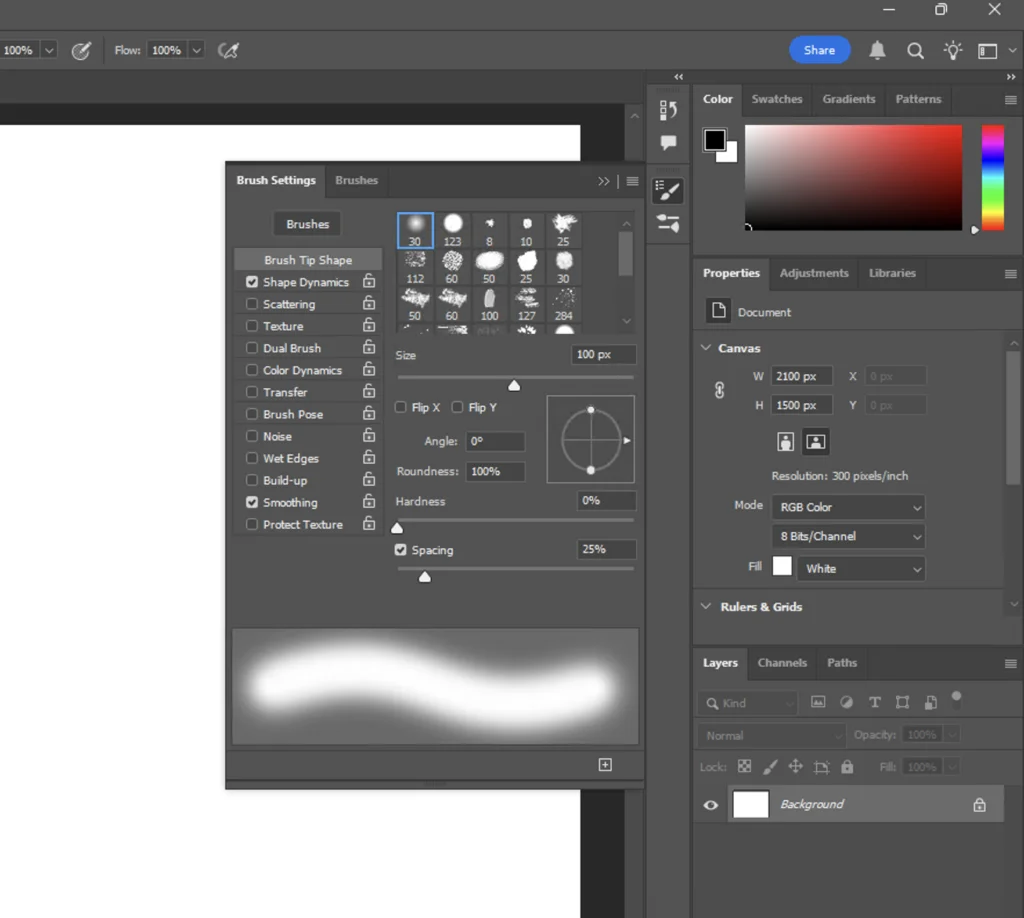
A frequent error is trying to load a **.ZIP** file directly. Photoshop cannot read compressed folders; you must extract them first to reveal the **.ABR** file. Another common issue is confusing the **Brush Settings** panel (F5) with the **Brushes** panel. Make sure you are using the **Brushes** panel (Window > Brushes) to perform the import.
Recommendations
How to Feather Edges in Photoshop: Easy and Fast Techniques
Feathering edges in Photoshop is a fundamental skill that softens the transition between a selection and its

How to Add Fonts to Photoshop: A Complete Guide for All Users
Adding fonts to Photoshop allows you to expand your creative toolkit by installing new typefaces directly to your
Last updated: 22.01.2026
Views: 9


