Adobe Lightroom operates as a dedicated photo editor and catalog management environment engineered to help photographers organize, cull, and adjust large collections of digital images. Designed for raw file processing, the application centralizes the digital darkroom workflow by storing original files in cloud storage while allowing local desktop hardware to handle intensive rendering tasks. Whether a user is sorting through a demanding commercial shoot or processing hundreds of images from a wedding, the software provides the specialized tools needed to correct exposure, fix white balance, and isolate subjects without permanently altering the original camera files.
Photographers rely on this desktop application because it handles high-volume batch editing far better than lightweight browser-based alternatives or basic system image viewers. Instead of opening and saving one picture at a time, users import entire folders, apply ratings, and synchronize color adjustments across multiple files instantly. The software reads raw data formats from major camera manufacturers—including CR3, NEF, and ARW—giving editors access to the full dynamic range captured by the camera sensor. Because the desktop client renders changes locally, it utilizes the computer's CPU and graphics card to process complex edits, resulting in less lag when dragging sliders or painting masks.
The interface divides the workflow into distinct functional views to maintain organization. The Grid view allows for rapid sorting using numerical shortcuts to assign star ratings and color labels, filtering out rejected shots before editing begins. Once the culling process is complete, editors switch to the detail-oriented adjustment panels to refine tone curves, fix optical distortion, and apply targeted color grading. Background syncing ensures that every flag, crop, and contrast adjustment reflects across the entire catalog automatically, protecting against data loss while keeping the local drive clear of duplicated export files until the final delivery stage.
Key Features
- Cloud-Native Cataloging: The application automatically backs up imported raw files to remote servers, syncing the entire library structure. Users navigate the library using the Grid view (shortcut G) or Loupe view (shortcut E), organizing files into albums and folders without manually moving items around the local Windows file system. This centralized approach means a photographer can begin sorting a shoot on a laptop and finish the color grading on a desktop workstation without exporting a catalog file.
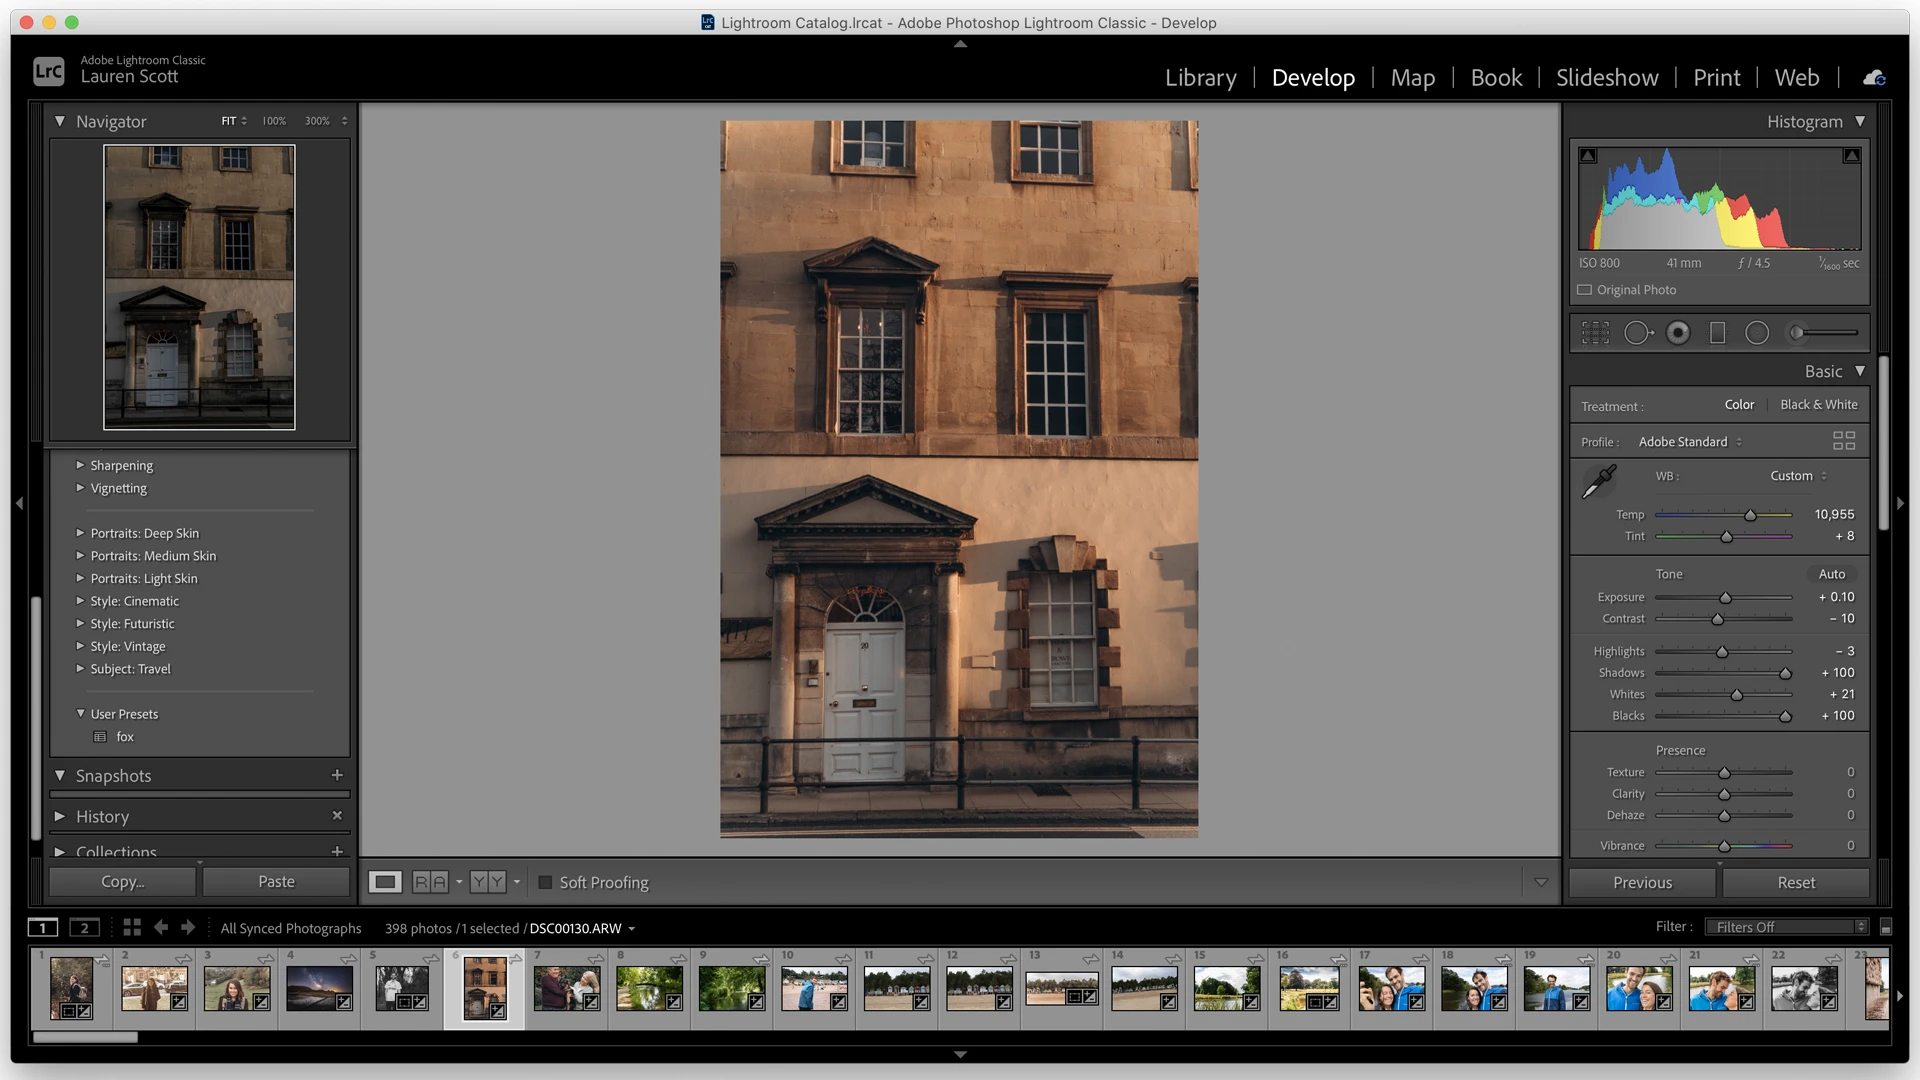
- Non-Destructive Editing: Changes made to an image do not overwrite the original camera data. The software stores edits as a set of text-based instructions within the catalog, allowing users to safely experiment with exposure, contrast, and color balance. Pressing the backslash key instantly toggles a before-and-after preview to check progress, ensuring the final image does not stray too far from the original lighting conditions.
- Advanced AI Masking: Editors can isolate specific parts of an image without drawing manual outlines. The masking panel features automated buttons for Select Subject, Select Sky, and Select Background. These selections can be refined using the Intersect tool, which combines the automatic mask with a manual brush or linear gradient for exact control.
- Batch Processing and Syncing: The software excels at applying a single cohesive look to an entire photo shoot. Editors can adjust the white balance and exposure on one image, copy the specific settings using the keyboard shortcut Ctrl+Shift+C, and paste those exact parameters onto hundreds of selected photos using Ctrl+Shift+V. This bulk processing capability significantly reduces the time spent correcting images captured under identical studio or natural lighting conditions.
- Color Grading Wheels: Moving beyond basic split toning, the interface includes a three-way color wheel system dedicated to shadows, midtones, and highlights. This tool provides granular control over the cinematic mood of a photograph, allowing users to shift the hue, saturation, and luminance of specific tonal ranges independently.
- Geometry and Perspective Correction: Architectural and real estate photographers use the Geometry panel to fix optical distortion and converging lines. The Upright tool analyzes the structural lines in an image to straighten horizons and correct skewed vertical elements, correcting issues caused by wide-angle lenses.
- Adaptive Presets: Instead of applying a flat, uniform filter over the entire photograph, these presets use artificial intelligence to target specific elements within the frame. With a single click, an editor can apply a preset that specifically whitens teeth, enhances eye clarity, softens skin texture, or darkens a bright sky, without affecting the clothing or background of the subject. The software automatically calculates the required mask boundaries.
How to Install Adobe Lightroom on Windows
- Download the Creative Cloud Desktop installer package from the official vendor website.
- Launch the downloaded executable file to begin the setup sequence and grant the necessary administrator permissions when prompted by Windows.
- Enter your account credentials on the sign-in screen, or create a new account to proceed with the installation.
- Wait for the setup wizard to install the background services and the Creative Cloud application manager onto your primary system drive.
- Open the newly installed Creative Cloud desktop interface, navigate to the Photography category within the Apps tab, and locate the software.
- Click the Install button next to the application name to initiate the core file download and automatic configuration.
- Launch the software from the Start menu once the progress bar completes, and configure your preferred local storage cache location before importing your first folder of raw images.
Adobe Lightroom Free vs. Paid
The application operates strictly on a subscription model and does not offer a perpetual license or a one-time purchase option. Users who want to test the software can access a 7-day free trial, which unlocks all editing features and cloud syncing capabilities. However, starting the trial requires entering a valid payment method, and the account will automatically convert to a paid subscription if it is not canceled before the trial period ends.
For standard users, the dedicated Lightroom plan costs $11.99 per month. This tier provides access to the desktop application and includes 1TB of remote storage to hold original raw files and synced catalog data. It is designed for photographers who want a streamlined interface and automatic backup, but it does not include access to other Adobe editing applications.
Editors requiring more advanced pixel-level manipulation usually opt for the Photography Plan, which is priced at $19.99 per month. This package bundles the software with Photoshop, Lightroom Classic, and 1TB of storage. While the company previously offered a lower-cost 20GB version of the Photography Plan, that option is no longer available to new subscribers. Canceling an annual subscription paid monthly before the year is up may incur an early termination fee, depending on the exact billing terms selected at checkout.
Adobe Lightroom vs. Capture One vs. darktable
Capture One targets studio professionals who require dependable tethered shooting and deep color customization. It interprets raw files from manufacturers like Fuji and Sony with unique default profiles that many commercial photographers prefer over standard interpretations. Unlike the centralized cloud ecosystem, Capture One uses a session-based workflow that keeps all files strictly local on the hard drive, avoiding mandatory remote backups and saving bandwidth. While it offers a perpetual license option alongside its subscription tiers, the entry price is considerably higher, making it an investment primarily for working professionals who need its advanced color balance tools, skin tone uniformity panels, and layer-based local adjustments.
darktable serves as a free, open-source raw developer that appeals to editors who want to avoid subscription fees entirely while maintaining strict control over their processing pipeline. Instead of a simplified, static slider panel, darktable uses a modular interface where users activate specific technical modules—like Filmic RGB or Color Zones—to handle tone mapping and color grading. It excels at local adjustments through complex parametric masks that isolate specific areas based on precise lightness or color channel values. However, the learning curve is steep compared to commercial editors, and the interface lacks the immediate visual simplicity that helps beginners learn photo editing.
Adobe Lightroom stands out as the practical middle ground for photographers who value speed and synchronized data over strictly technical file control. Its automated selection tools and adaptive presets process high-volume shoots much faster than darktable's manual modules. Furthermore, the lower starting subscription cost and automatic backup system make it a more accessible choice than Capture One for independent creators who edit across multiple computers and need a consistent, reliable catalog.
Common Issues and Fixes
- Syncing stuck or paused indefinitely. Click the cloud icon in the upper right corner of the interface to view the sync status. Manually pause and then resume the sync process. If the queue remains stuck, check the Creative Cloud desktop manager to ensure network connectivity is active and no background updates are blocking the data transfer.
- Performance lagging during brushing or masking. Rendering local adjustments on large raw files can stress the system. Navigate to Edit > Preferences > Performance and inspect the graphics processor status. Toggling the GPU acceleration from Auto to Custom, or disabling it entirely, can bypass driver conflicts and restore brush responsiveness.
- Local system drive filling up quickly. The software maintains a cache of smart previews and original files to speed up browsing. Go to Edit > Preferences > Local Storage and change the cache location to a secondary internal or external hard drive. You can also lower the percentage of disk space allocated for this temporary storage.
- Creative Cloud manager fails to install the application. Background service conflicts can prevent the installer from unpacking files. Close all related processes in the Windows Task Manager, run the official Creative Cloud Uninstaller tool, and reinstall the desktop manager from scratch before attempting to download the photo editor again.
- Raw files display incorrect colors upon import. Sometimes the software applies a default color profile that flattens the contrast of specific camera models. To fix this, open the Develop panel, locate the Profile browser at the top of the basic adjustment section, and change the setting from Adobe Color to Camera Standard or another manufacturer-specific profile to restore the intended look.
Version 15.2 — February 2026
- Added Adobe Firefly integration, allowing users to perform prompt-based generative AI edits or generate short video clips directly from still photographs.
- Added full support for importing, viewing, and editing the WebP image format (exporting to WebP is not yet supported).
- Added a new Generative Upscale feature in Lightroom Desktop powered by Topaz Gigapixel, letting users enlarge images by 2x or 4x utilizing Generative Credits.
- Improved the AI-driven Assisted Culling tools with upgraded Subject Selection and Eye Focus models, making it much easier to detect open or closed eyes in large group portraits.
- Improved application performance and processing speeds when using the Remove tool, Red Eye Removal, Geometry adjustments, and working with complex masks.
- Added new raw profiles to support the latest camera bodies and lenses.
- Fixed multiple user-reported bugs, including freezing during catalog migration, alignment issues in the Print module, broken Map modules on Windows, and general app crashes.