Description
Recovering lost files from your Windows PC doesn't require a degree in computer science. Whether you accidentally deleted a critical project, emptied the Recycle Bin, or encountered a corrupted drive, Stellar Data Recovery provides a powerful yet user-friendly solution. By following a structured workflow, you can scan your storage media, preview recoverable files in real-time, and restore them to a safe location.
What You'll Need
Before you begin, ensure you have the following ready to maximize your chances of success:
- Stellar Data Recovery for Windows: The latest version (updated Jan 2025 or later) recommended for the new "on-the-fly" preview features.
- Target Drive: The drive you want to recover data from (e.g., your C: drive, USB stick, or SD card).
- Destination Drive: A separate external hard drive or USB stick to save the recovered files.
Crucial Warning: Never save recovered files back to the same drive they were lost from, as this can overwrite the data you are trying to save. - Admin Access: You will need administrator privileges on your Windows PC to run the software.
Step-by-Step Guide
- Launch the Software
Open Stellar Data Recovery. If prompted by Windows User Account Control, click Yes to grant necessary permissions.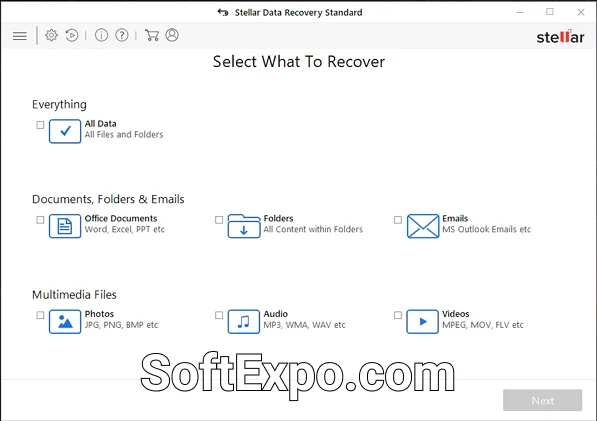
- Select File Types
On the dashboard labeled Select What to Recover, you will see options like "Everything," "Documents," "Emails," "Photos," and "Audio."
Tip: Uncheck "All Data" and select only the specific file types you need (e.g., just "Photos" and "Videos") to significantly speed up the scan. Click Next.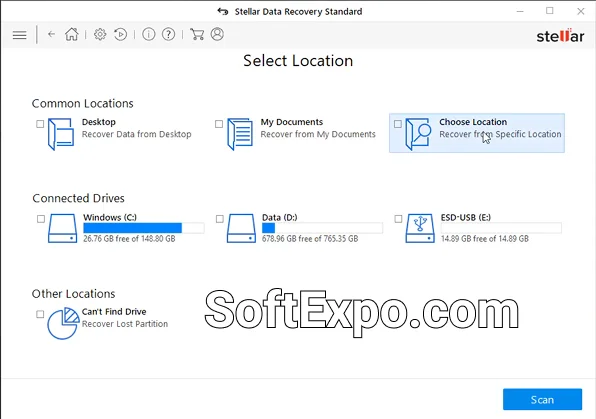
- Select the Location
On the Recover From screen, choose the drive or specific folder where your files were lost.
For lost partitions, look for the "Can't Find Drive" option. For external devices, ensure they are connected and appear under "Connected Drives." Click Scan.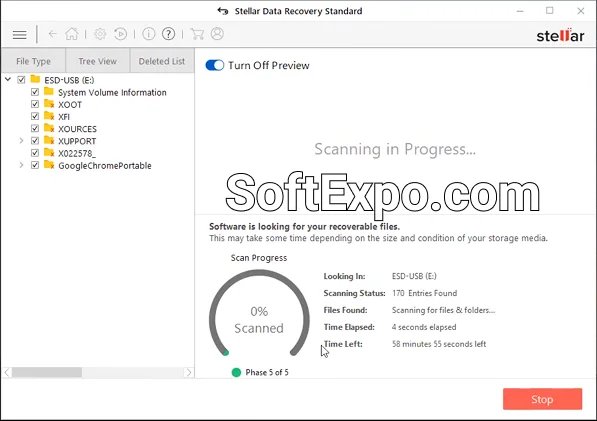
- Monitor the Scan (On-the-Fly Preview)
The software will begin a Quick Scan. Thanks to the 2025 update, you don't have to wait for it to finish. You can browse the "File Type" or "Tree View" tabs in the left sidebar immediately. If you see your missing file, you can pause the scan.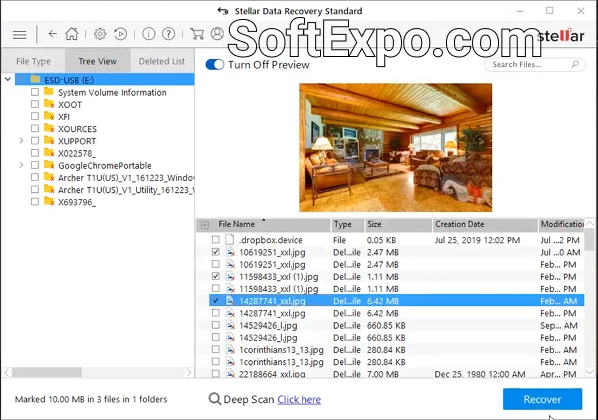
- Run a Deep Scan (If Needed)
If the Quick Scan finishes but you don't see your files, look for the Deep Scan link at the bottom of the interface. Click it to initiate a sector-by-sector search.
Note: This process is much slower but highly effective for formatted or corrupt drives.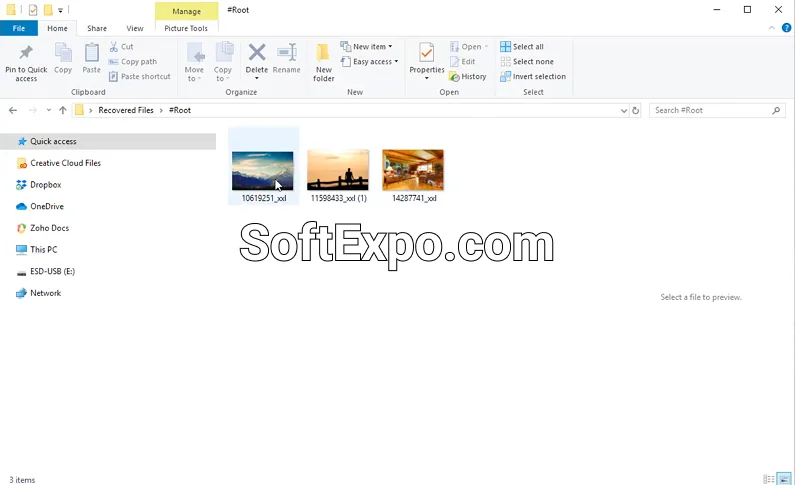
- Preview Files
Double-click a file in the list to launch a preview window. Verify the file content is intact (e.g., the image displays correctly or the document text is readable) before recovering. - Select and Recover
Check the boxes next to the files or folders you want to restore. Click the large Recover button at the bottom right. - Save to a Different Drive
A dialog box will appear asking for a destination. Click Browse and select your external drive or a different partition. Click Start Saving to complete the process.
Tips for Better Results
- Stop Using the Drive Immediately: The moment you realize data is missing, stop writing new files to that drive. New data can overwrite the "ghost" footprint of deleted files, making recovery impossible.
- Save Scan Information: If a scan takes hours, you don't have to finish recovery in one sitting. Click the Back button or close the app, and it will ask if you want to save the scan information. Save this
.DATfile to resume recovery later without rescanning. - Use Specific Search: In the preview window, use the search bar at the top right to find files by specific extensions (e.g.,
*.pdfor*.jpg) if the list is too long. - Check "Raw Data" Folder: If your file names are lost, check the "Raw Data" folder in the Tree View. Your files might be there, identified only by file type (e.g., "FILE001.jpg").
Common Mistakes to Avoid
- Recovering to the Source Drive: This is the #1 error. Saving restored files to the same damaged drive causes permanent data corruption. Always use a secondary storage device.
- Ignoring the Deep Scan: If a Quick Scan returns zero results, users often give up. The Deep Scan is essential for complex data loss scenarios like formatted partitions or virus attacks.
- Disconnecting Drives Mid-Scan: Never unplug an external drive while scanning or recovering. This can physically damage the file system and make future recovery attempts fail.
Recommendations

How to Feather Edges in Photoshop: Easy and Fast Techniques
Feathering edges in Photoshop is a fundamental skill that softens the transition between a selection and its

How to Install Brushes in Adobe Photoshop: Simple Instructions
Installing custom brushes in Adobe Photoshop allows you to expand your creative toolkit beyond the default options. By

Last updated: 22.01.2026
Views: 29


